
目录
ElasticSearch
0. 前提
在进行JAVA API的学习之前,首先需要了解下JDK 和Elasticsearch的版本对应关系
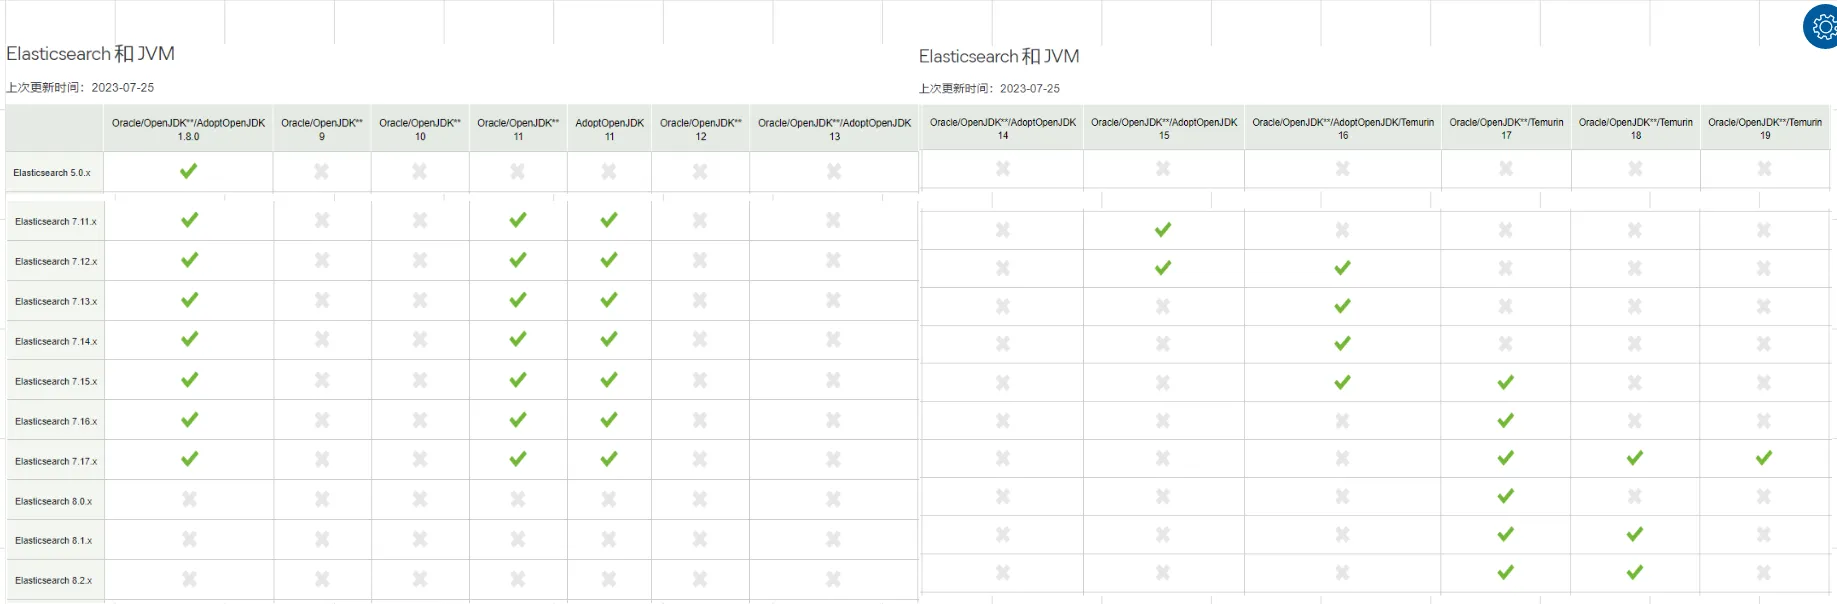
通过上面的对应关系,可以得到一下结论:
elasticsearch版本从8.x开始,需要jdk 17+才能支持elasticsearch 7.17.x,对jdk8、11、17都支持
因此,对于elasticsearch 7.x 只要是jdk8以上,能支持到最大版本elasticsearch 7.17.x
注意: 本文采用 elasticsearch 7.17.14
1. 安装
1.1 windows
集群
集群包含3个节点,如下:
es-9200
es-9201
es-9202
配置
sh# ======================== Elasticsearch Configuration =========================
#
# NOTE: Elasticsearch comes with reasonable defaults for most settings.
#       Before you set out to tweak and tune the configuration, make sure you
#       understand what are you trying to accomplish and the consequences.
#
# The primary way of configuring a node is via this file. This template lists
# the most important settings you may want to configure for a production cluster.
#
# Please consult the documentation for further information on configuration options:
# https://www.elastic.co/guide/en/elasticsearch/reference/index.html
#
# ---------------------------------- Cluster -----------------------------------
#
# Use a descriptive name for your cluster:
#
cluster.name: my-application
#
# ------------------------------------ Node ------------------------------------
#
# Use a descriptive name for the node:
#
node.name: node-9201
#
# Add custom attributes to the node:
#
#node.attr.rack: r1
#
# ----------------------------------- Paths ------------------------------------
#
# Path to directory where to store the data (separate multiple locations by comma):
#
#path.data: /path/to/data
#
# Path to log files:
#
#path.logs: /path/to/logs
#
# ----------------------------------- Memory -----------------------------------
#
# Lock the memory on startup:
#
#bootstrap.memory_lock: true
#
# Make sure that the heap size is set to about half the memory available
# on the system and that the owner of the process is allowed to use this
# limit.
#
# Elasticsearch performs poorly when the system is swapping the memory.
#
# ---------------------------------- Network -----------------------------------
#
# By default Elasticsearch is only accessible on localhost. Set a different
# address here to expose this node on the network:
#
network.host: localhost
#
# By default Elasticsearch listens for HTTP traffic on the first free port it
# finds starting at 9200. Set a specific HTTP port here:
#
http.port: 9201
#tcp监听端口
transport.tcp.port: 9301
#
# For more information, consult the network module documentation.
#
# --------------------------------- Discovery ----------------------------------
#
# Pass an initial list of hosts to perform discovery when this node is started:
# The default list of hosts is ["127.0.0.1", "[::1]"]
#
discovery.seed_hosts: ["localhost:9300"]
#
# Bootstrap the cluster using an initial set of master-eligible nodes:
#
cluster.initial_master_nodes: ["node-9200"]
#
# For more information, consult the discovery and cluster formation module documentation.
#
# ---------------------------------- Various -----------------------------------
#
# Require explicit names when deleting indices:
#
#action.destructive_requires_name: true
#
# ---------------------------------- Security ----------------------------------
#
#                                 *** WARNING ***
#
# Elasticsearch security features are not enabled by default.
# These features are free, but require configuration changes to enable them.
# This means that users don’t have to provide credentials and can get full access
# to the cluster. Network connections are also not encrypted.
#
# To protect your data, we strongly encourage you to enable the Elasticsearch security features.
# Refer to the following documentation for instructions.
#
# https://www.elastic.co/guide/en/elasticsearch/reference/7.16/configuring-stack-security.html
#跨域配置
http.cors.enabled: true
http.cors.allow-origin: "*"
安全选项
开启安全选项时,访问elasticsearch时,需要输入用户名、密码
- 开启
elasticsearch.yml中,security相关部分,添加如下内容:
xpack.security.enabled: true
-
生成密码
创建密码
widdo_elastic。集群方式时,在任意一个节点上,执行一次。包含两种方式:-
auto自动./bin/elasticsearch-setup-passwords auto -
interactive手动./bin/elasticsearch-setup-passwords interactive
-

注意
-
给用户设置密码之后,不能再次执行
elasticsearch-setup-passwords命令 -
可以在集群上任意一个节点上执行命令
-
整个集群只需要执行一次
-
配置密码
配置kibana使用用户名密码连接elasticsearch
- 在
kibana配置文件kibana.yml中添加以下配置
elasticsearch.username: "kibana_system"
-
创建
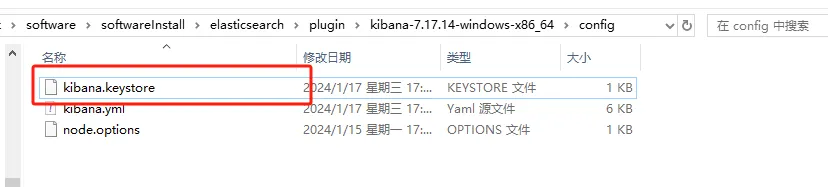
kibana keystore*,添加安全配置-
创建
keystore./bin/kibana-keystore create
-
添加配置
./bin/kibana-keystore add elasticsearch.password
-
完了之后,在kibana的config目录下会多一个文件kibana.keystore
问题
启动报错
property [elasticsearch.version] is missing for plugin [head]

原因:
elasticsearch-head插件放入elasticsearch的plugin目录下的原因,elasticsearch-head在5.x已经不能作为es插件安装了。现在Chrome浏览器已经有elasticsearch-head插件了
集群发现不了
添加如下配置
- 内部通信端口
每个节点都需要添加
transport.tcp.port: 9300
- 节点发现
discovery.seed_hosts: ["localhost:9300"]
head插件需要配置跨域
http.cors.enabled: true
http.cors.allow-origin: "*"
1.2 linux
2. 工具
使用apipost进行学习
3. 入门 HTTP
本章节提供 http方式进行elasticsearch的常用操作。PUT具有幂等性,每次结果都一样,POST没有幂等性
3.1 索引-创建
ApiPost中执行以下命令
httphttp://localhost:9200/employee
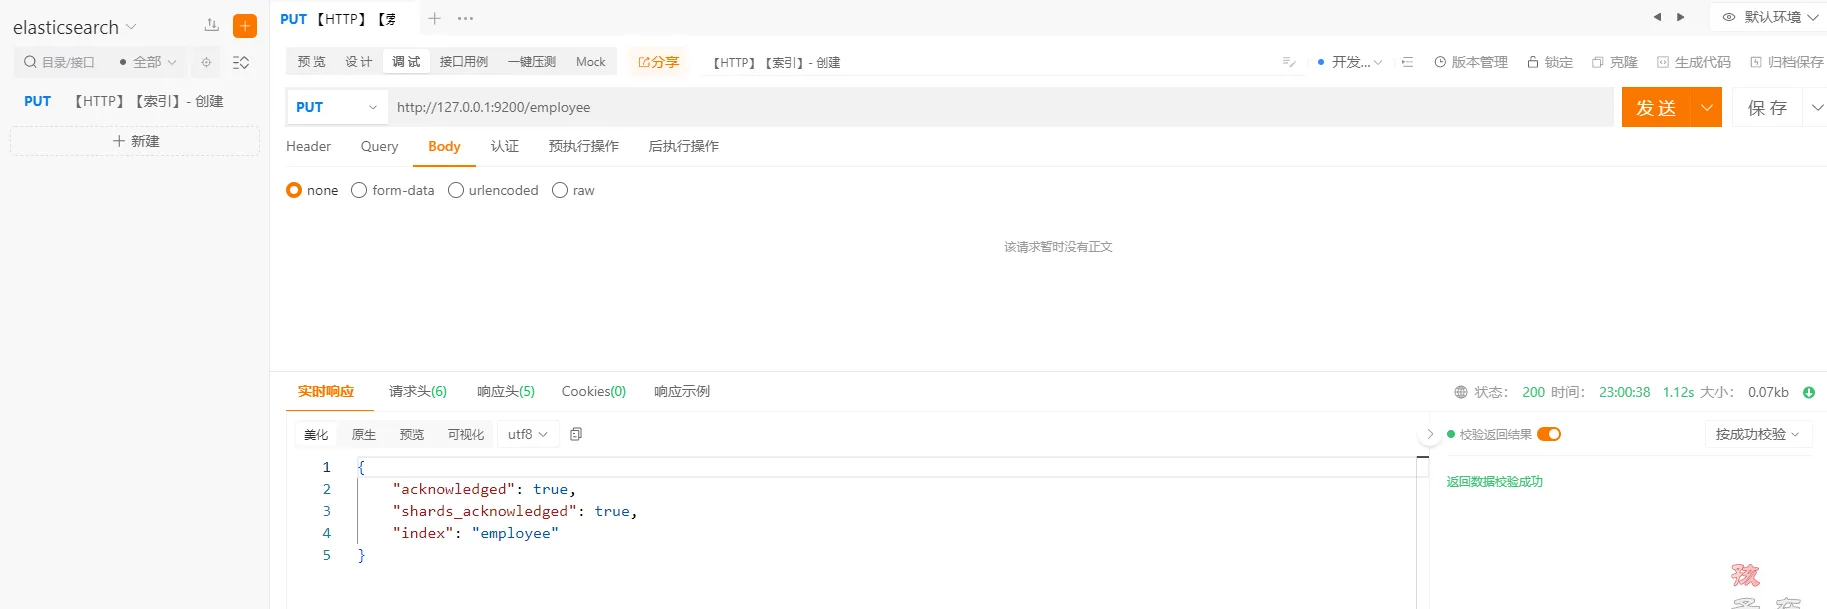
重复创建相同索引

**注意:**重复创建相同的索引会报错,所以在创建索引的时候,需要先判断索引是否存在
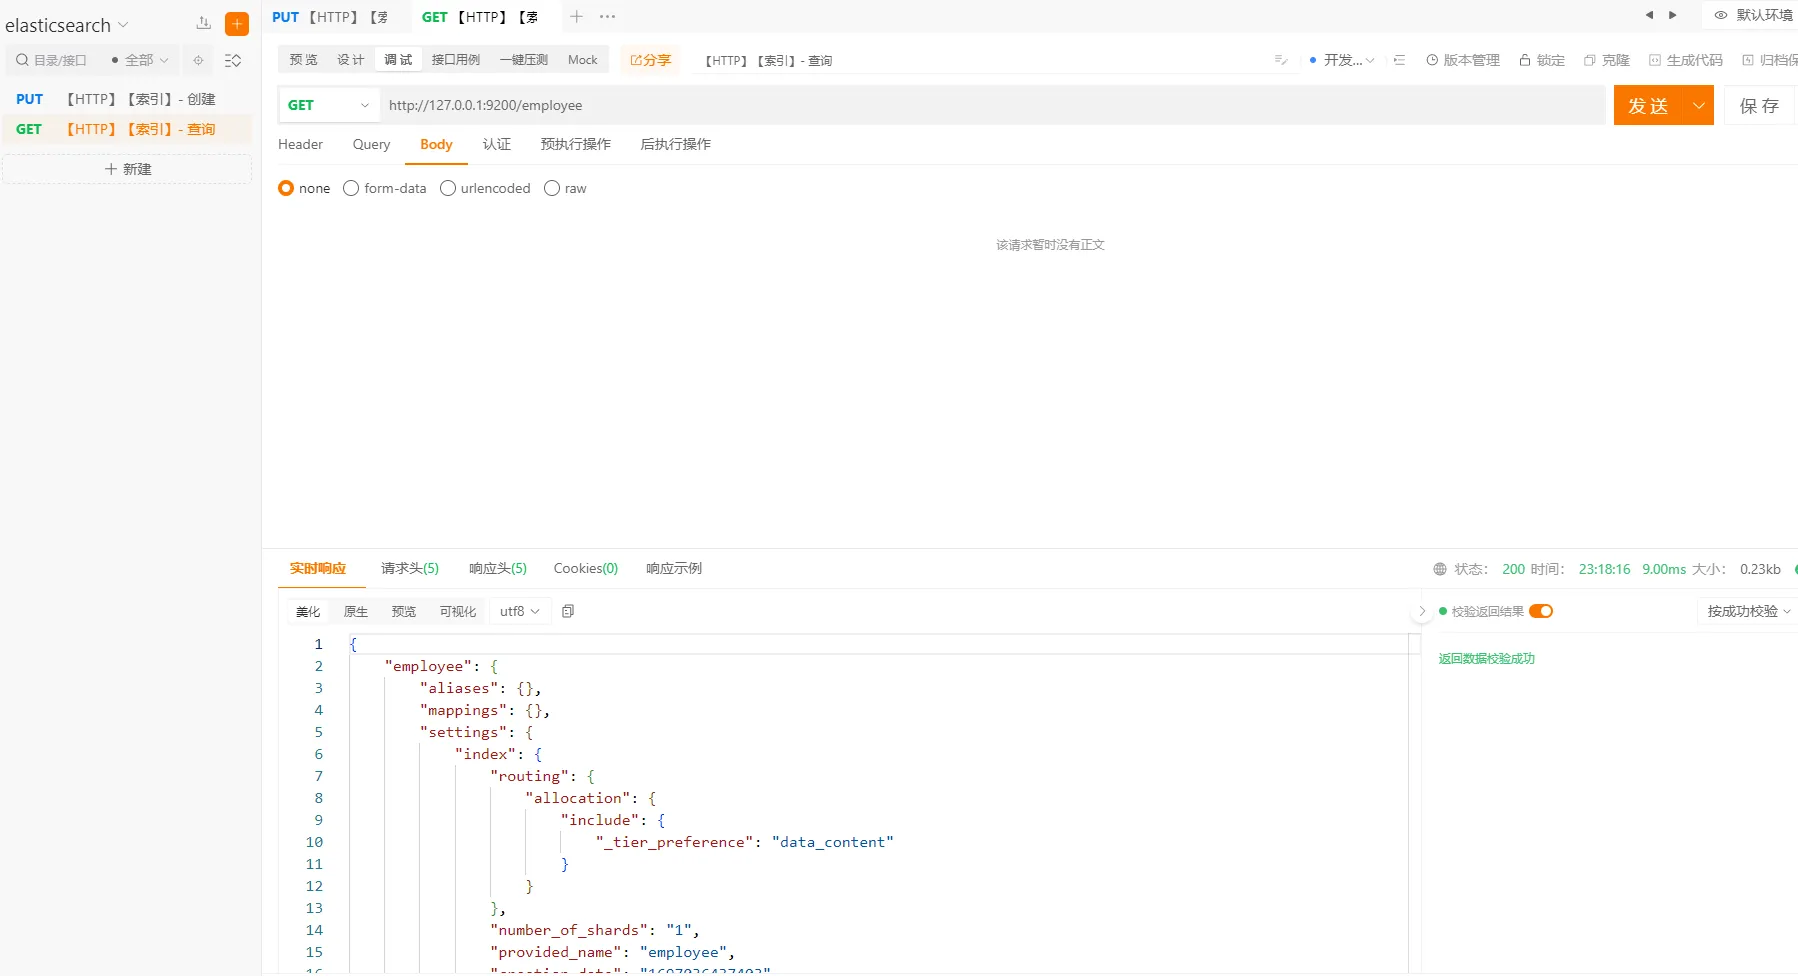
3.2 索引-查询
执行以下命令
http://127.0.0.1:9200/employee
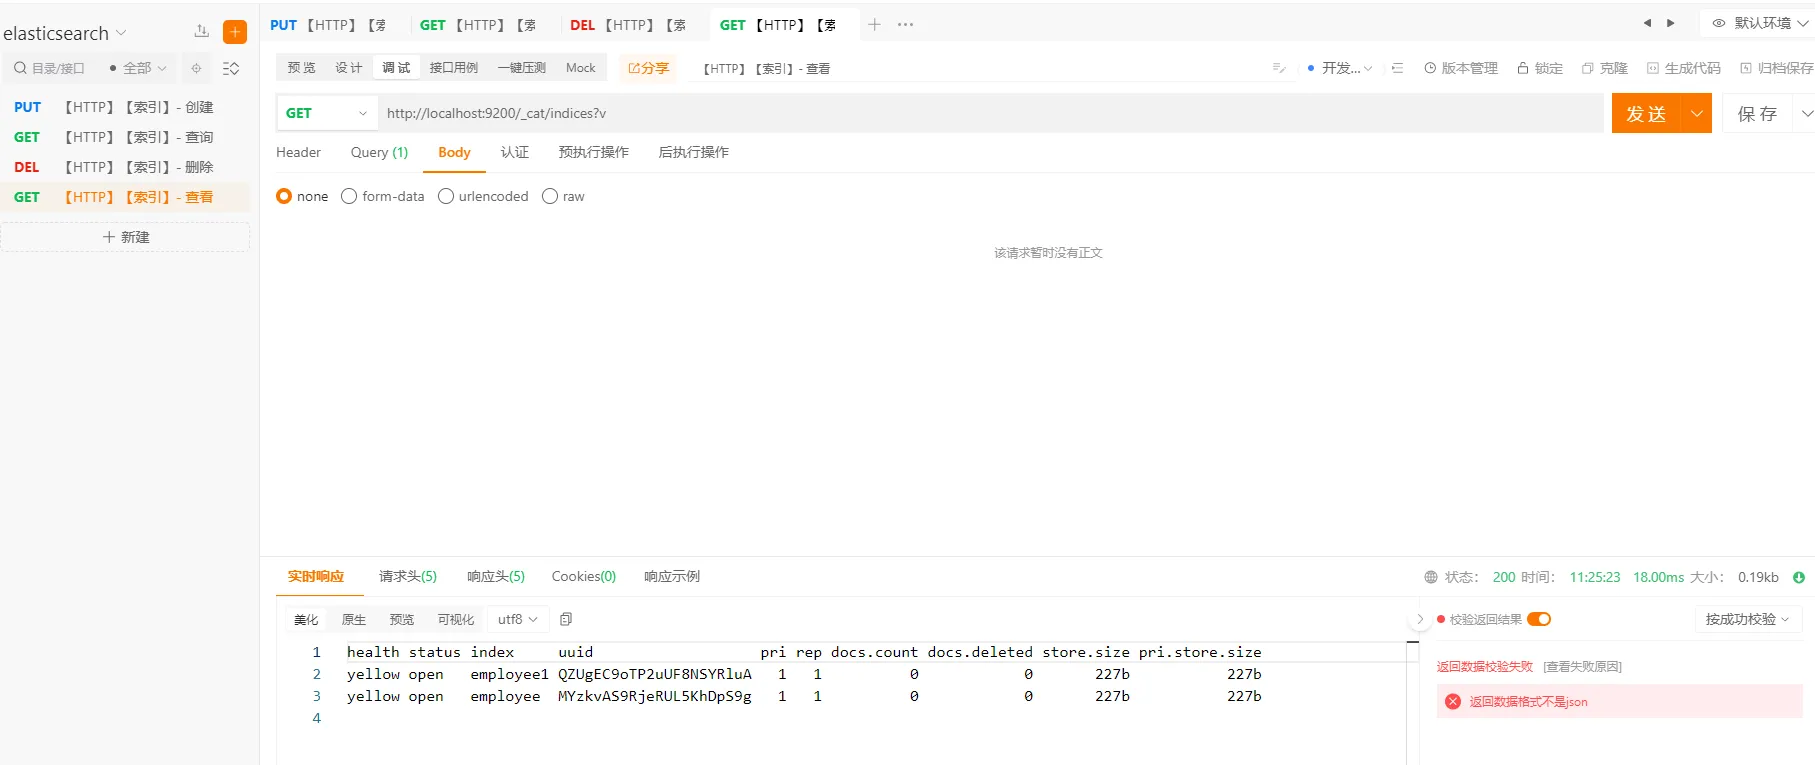
3.3 索引-查看
查看所有索引信息
执行以下命令
http://127.0.0.1:9200/_cat?v
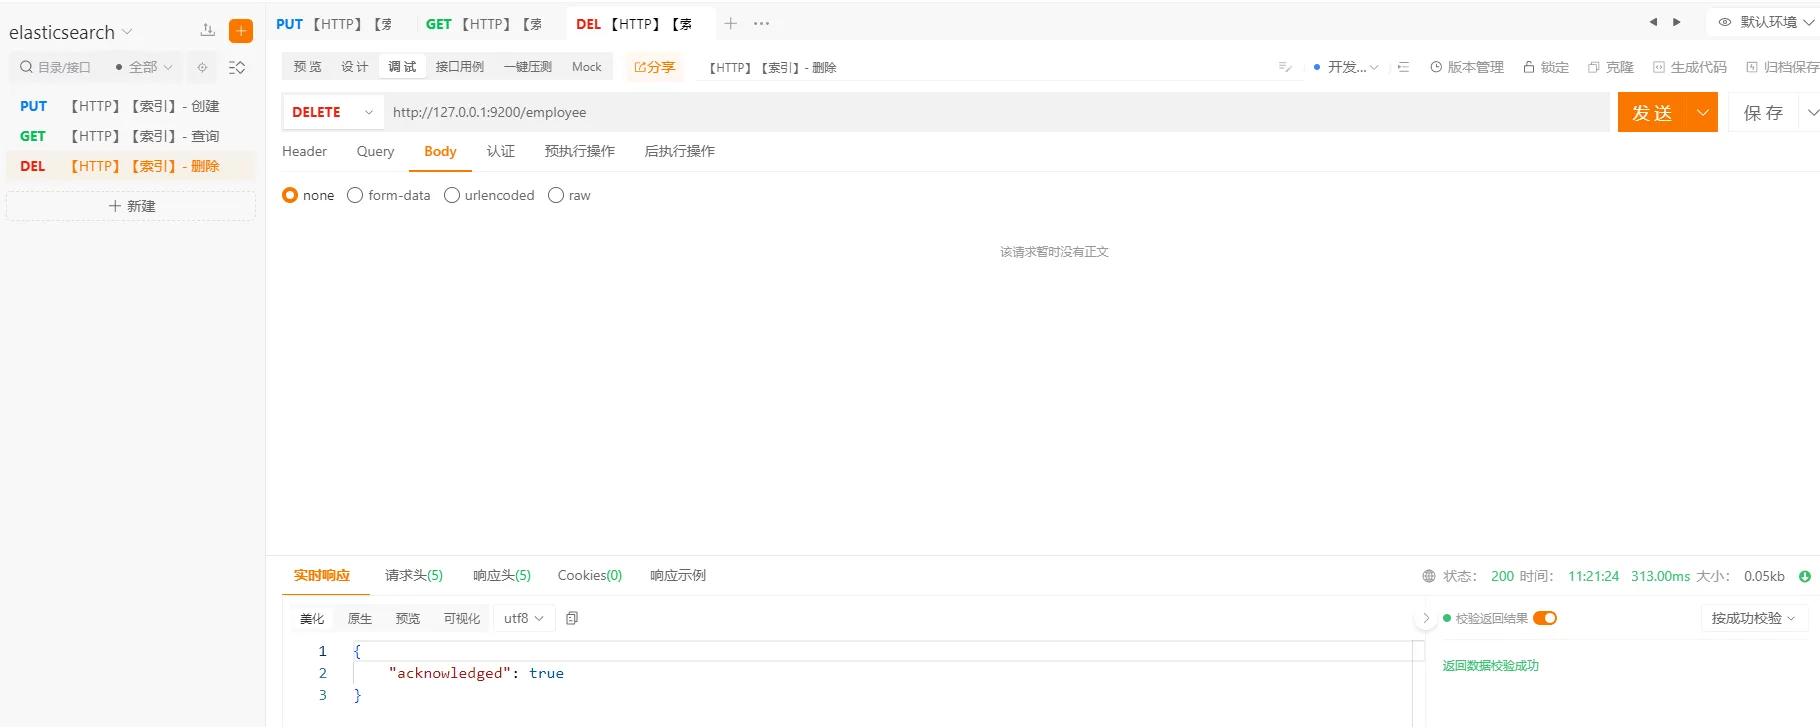
3.3 索引-删除
执行以下命令
http://127.0.0.1:9200/employee
3.4 文档-创建
本章节展示文档创建相关的操作。文档的创建可以使用_doc或者_create
命令
http://127.0.0.1:9200/employee/_doc
或者
http://127.0.0.1:9200/employee/_create
- 方式一
请求方式
post
URL
http://127.0.0.1:9200/employee/_doc
参数
json{
    "name": "张三",
    "age": 18,
    "sex": "男",
    "address": "北京"
}
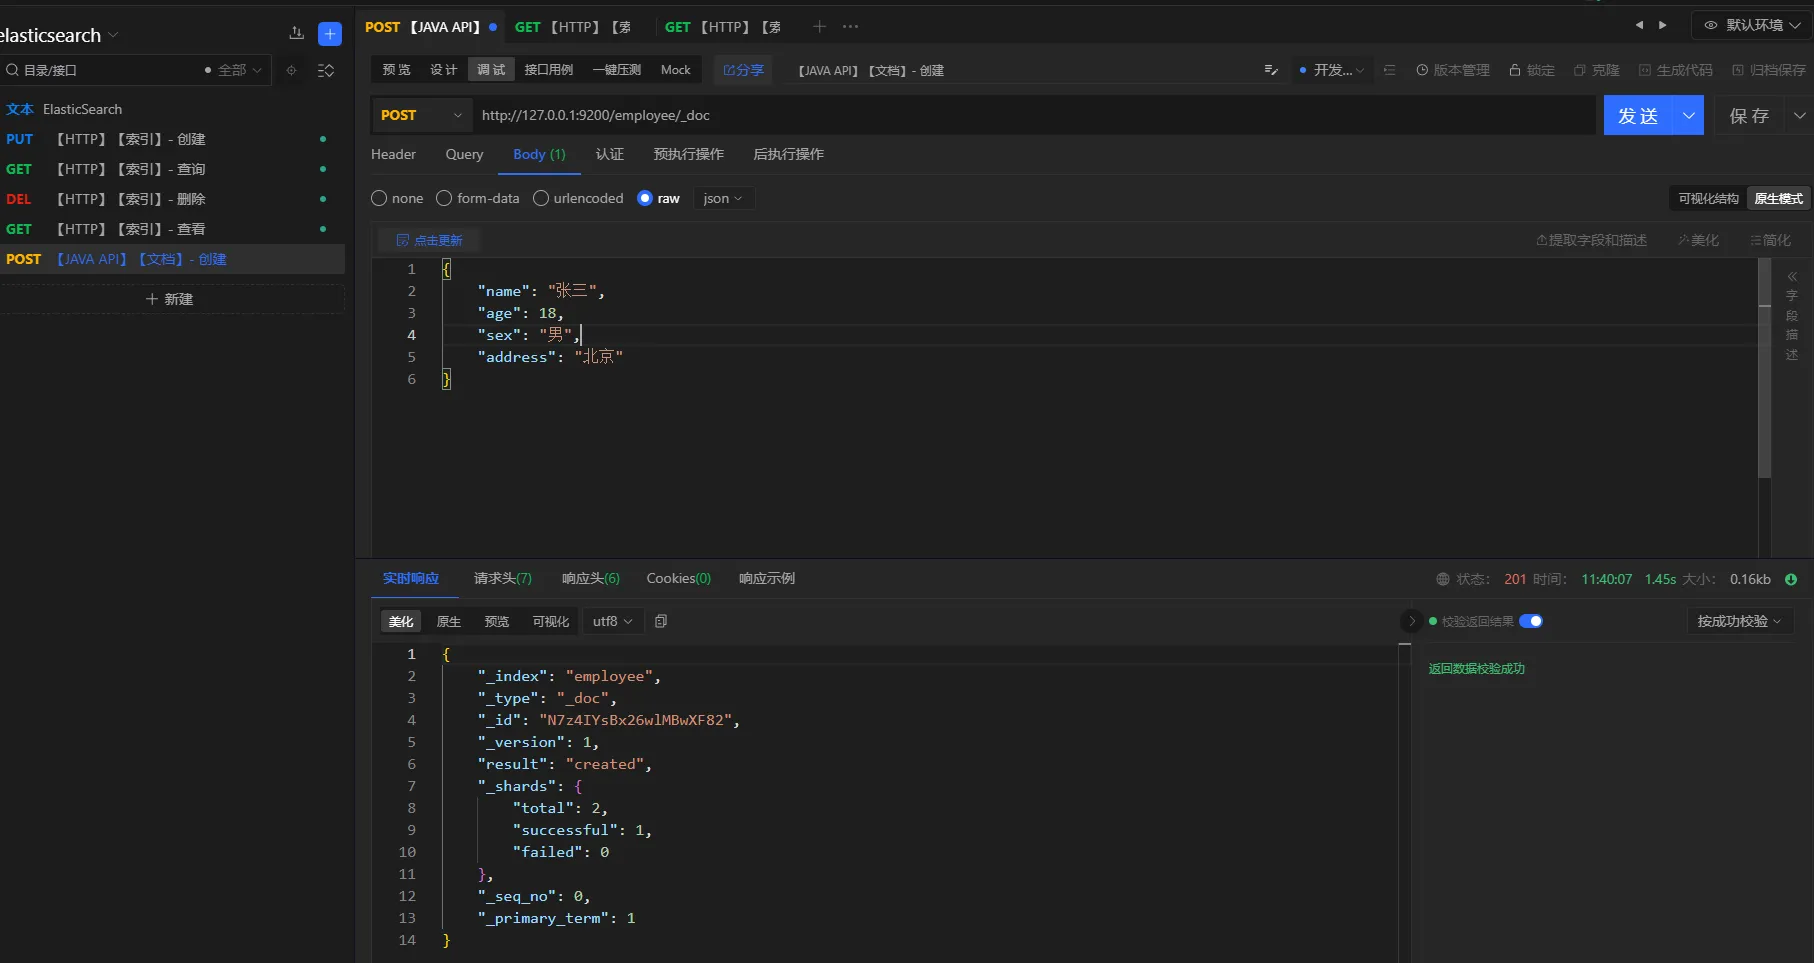
注意:文档创建成功之后,会自动生成一个
id,但是不太好记。因此,可以在创建文档的时候,指定id,例如:http://127.0.0.1:9200/employee/_doc/1001 或者 http://127.0.0.1:9200/employee/_create/1001
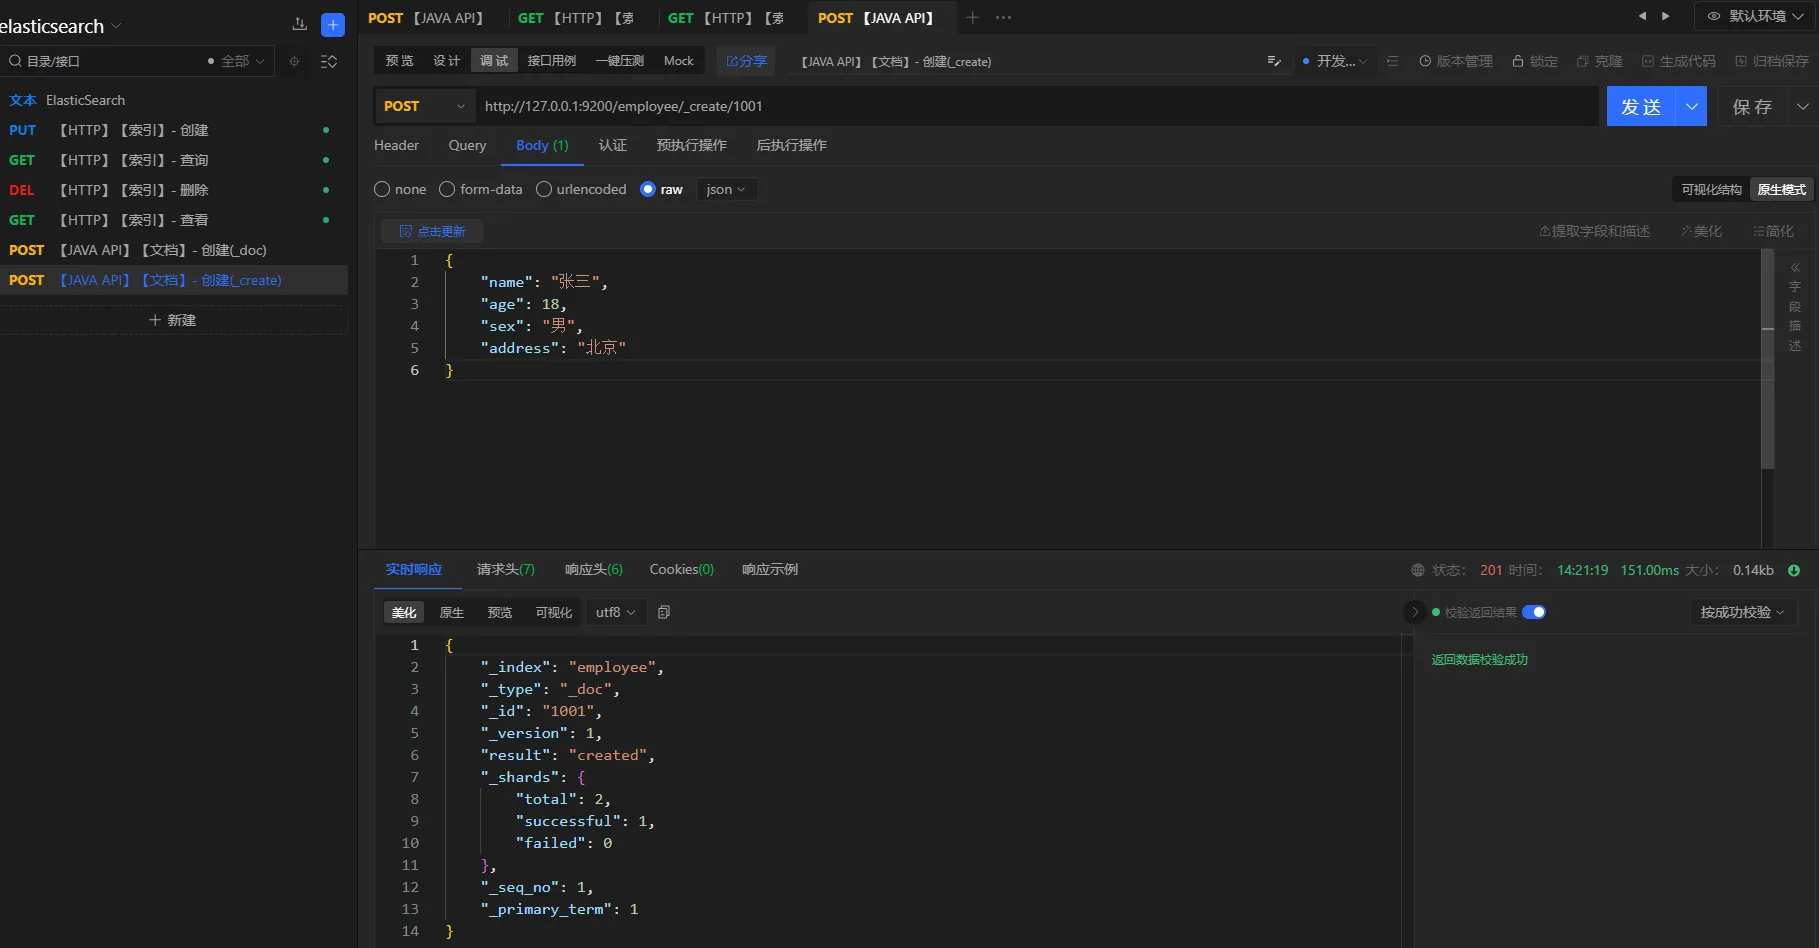
- 方式二
请求方式
post
URL
http://127.0.0.1:9200/employee/_create/1001
参数
json{
    "name": "张三",
    "age": 18,
    "sex": "男",
    "address": "北京"
}
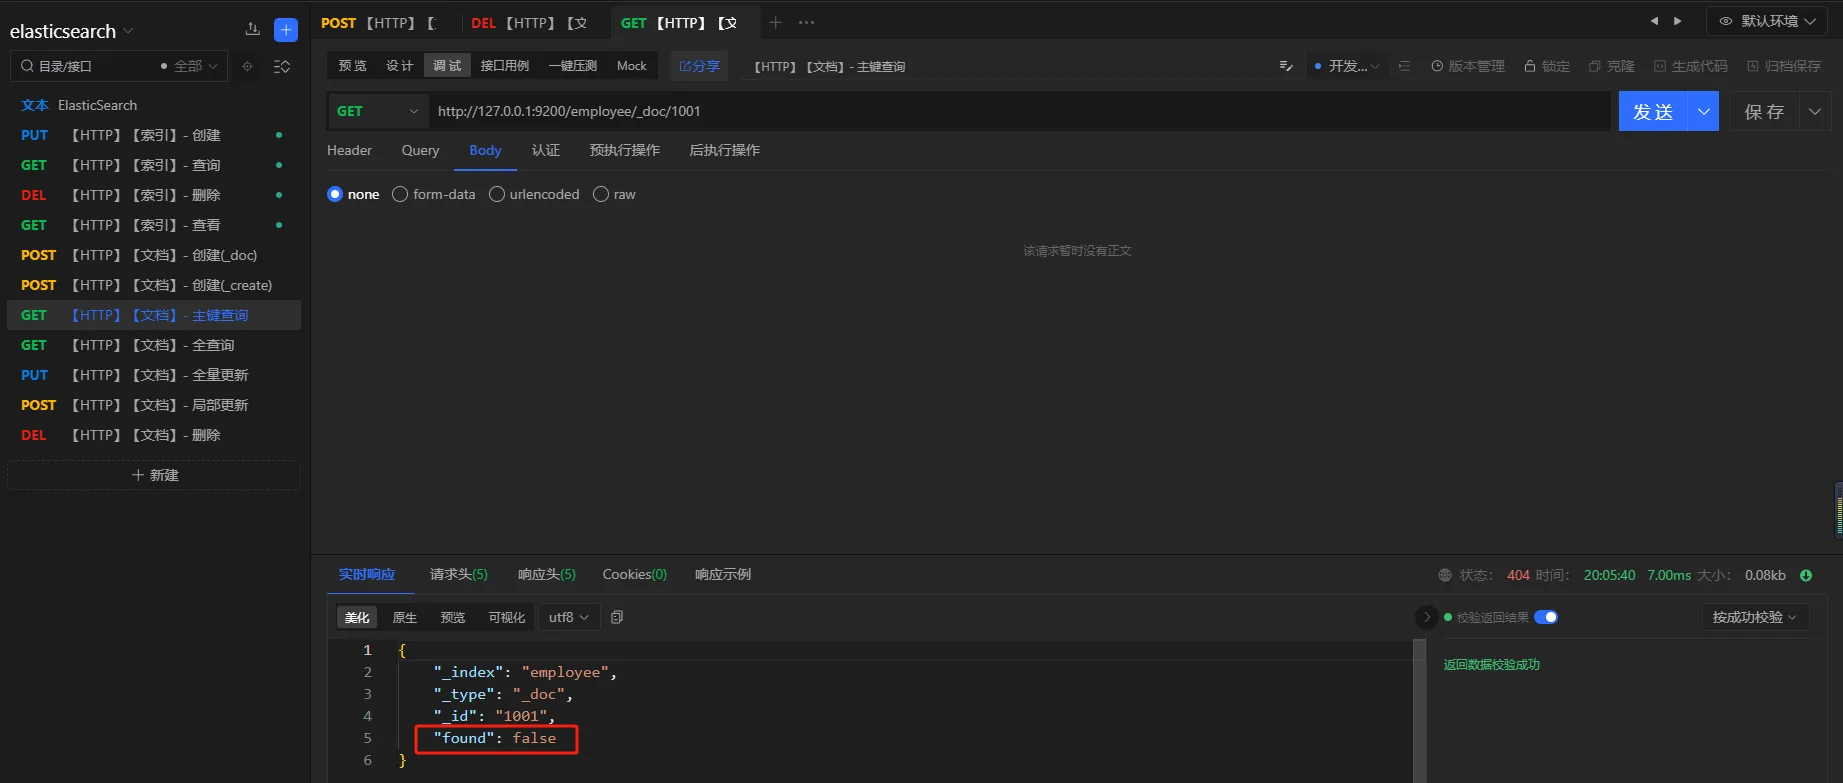
3.5 文档-查询
提供文档查看的常用操作。主键查询、全查询
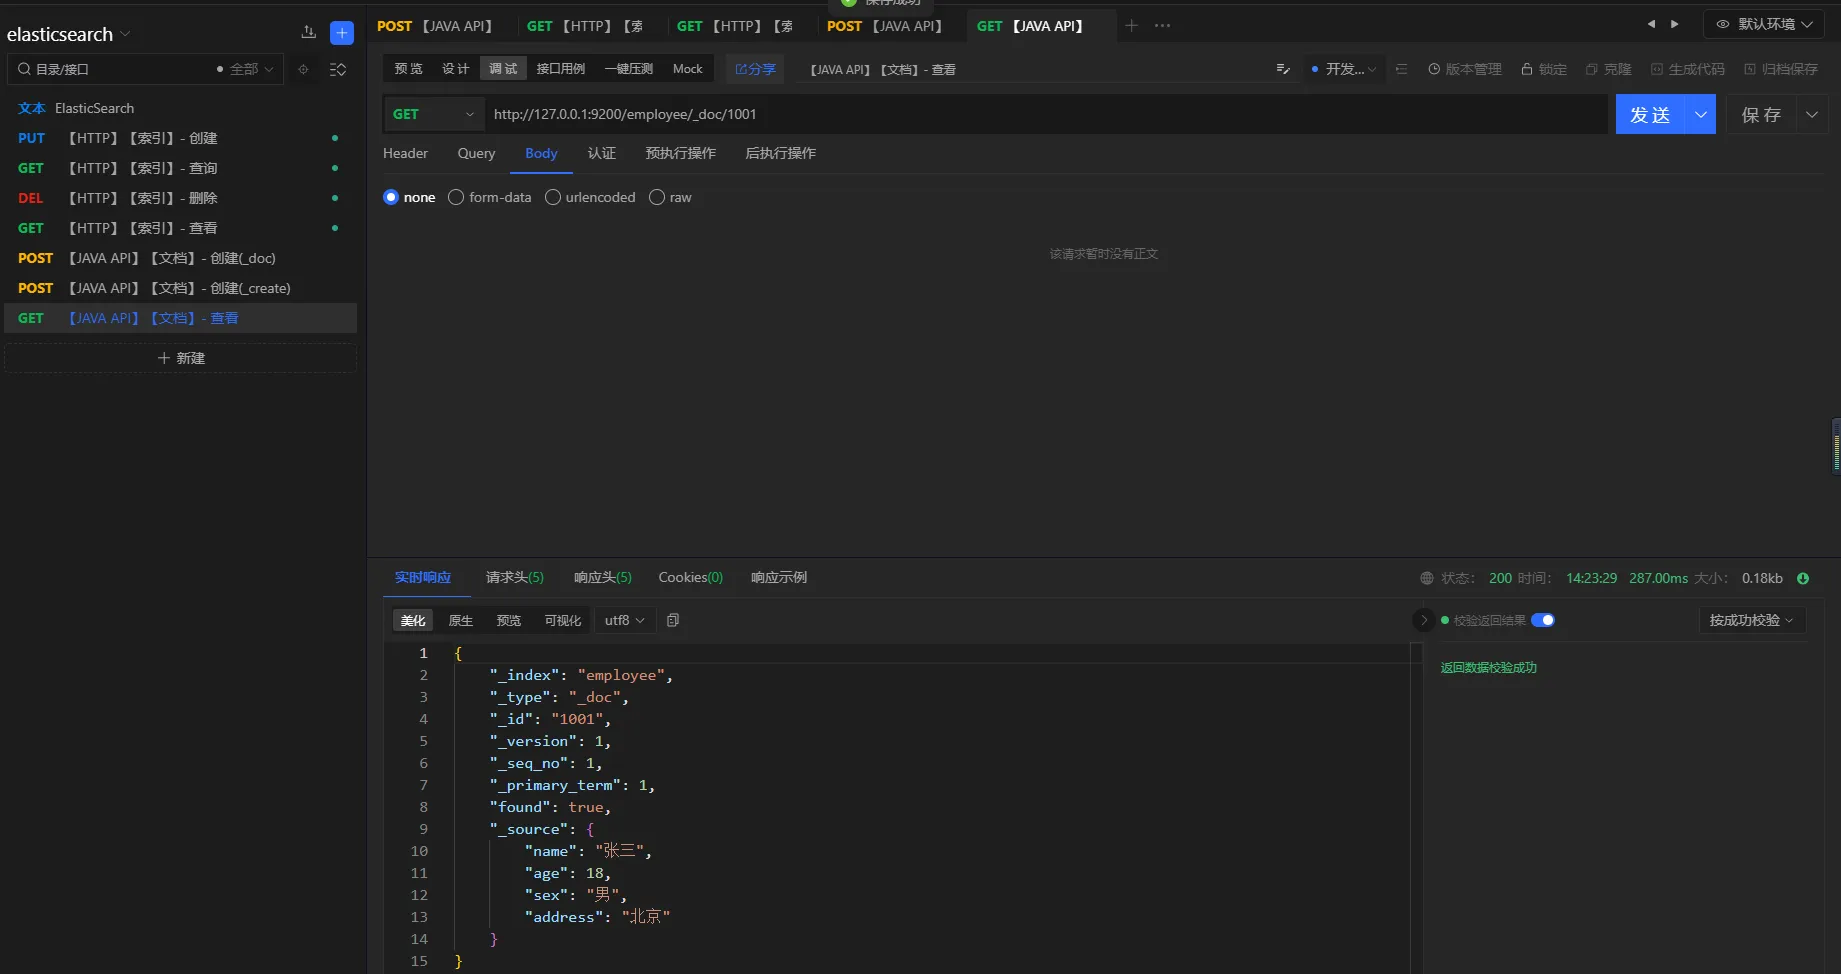
3.5.1 主键查询
请求方式
get
URL
http://127.0.0.1:9200/employee/_doc/1001
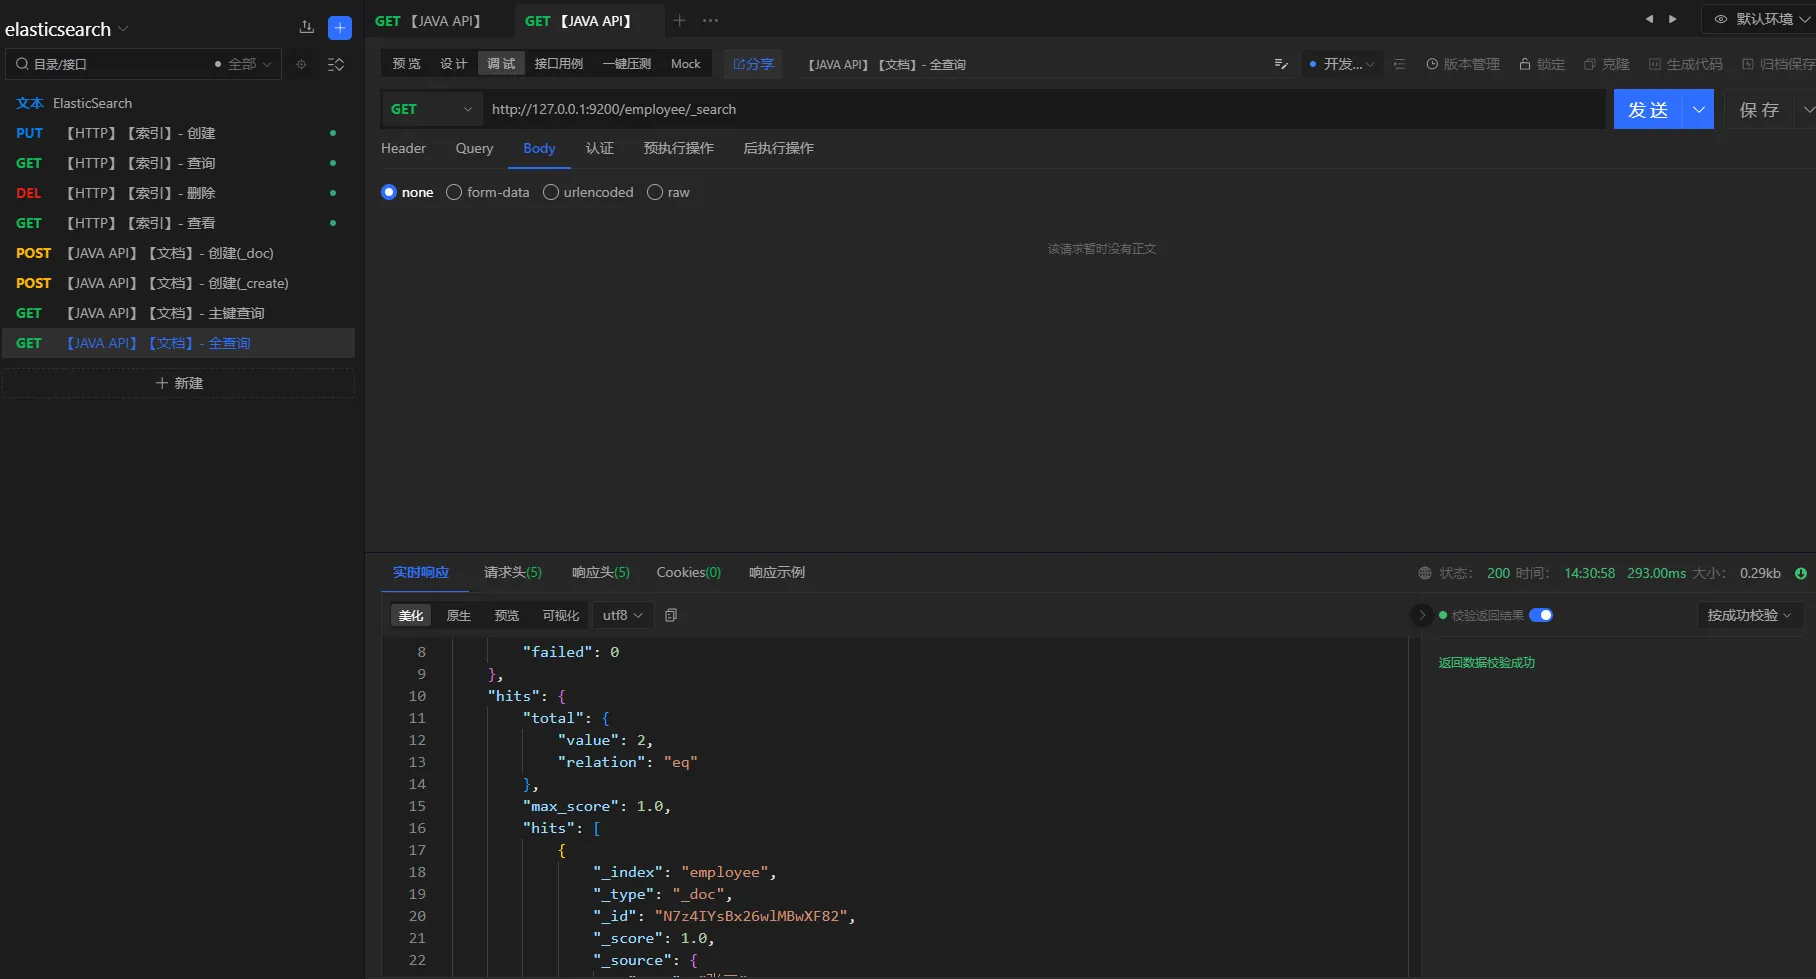
3.5.2 全查询
请求方式
get
URL
http://127.0.0.1:9200/employee/_search
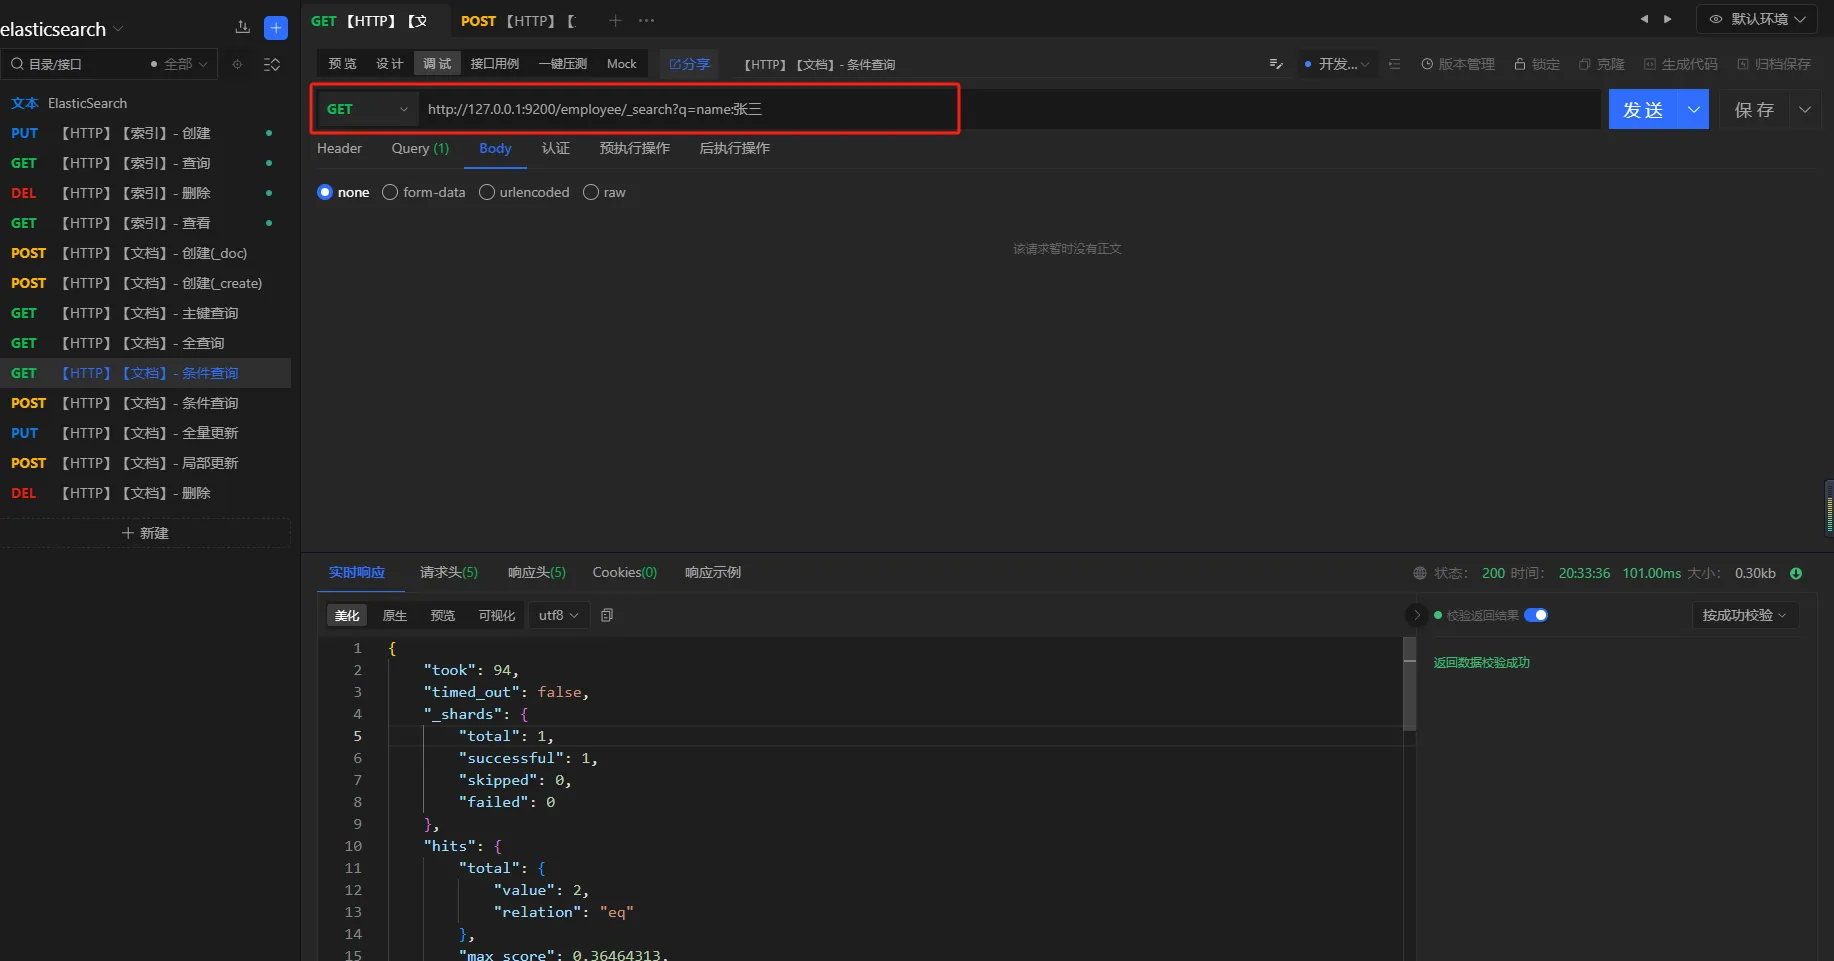
3.5.3 条件查询
- 方式一
查询条件
查询所有名称叫张三的员工
请求方式
GET
URL
http://127.0.0.1:9200/employee/_search?q=name:张三
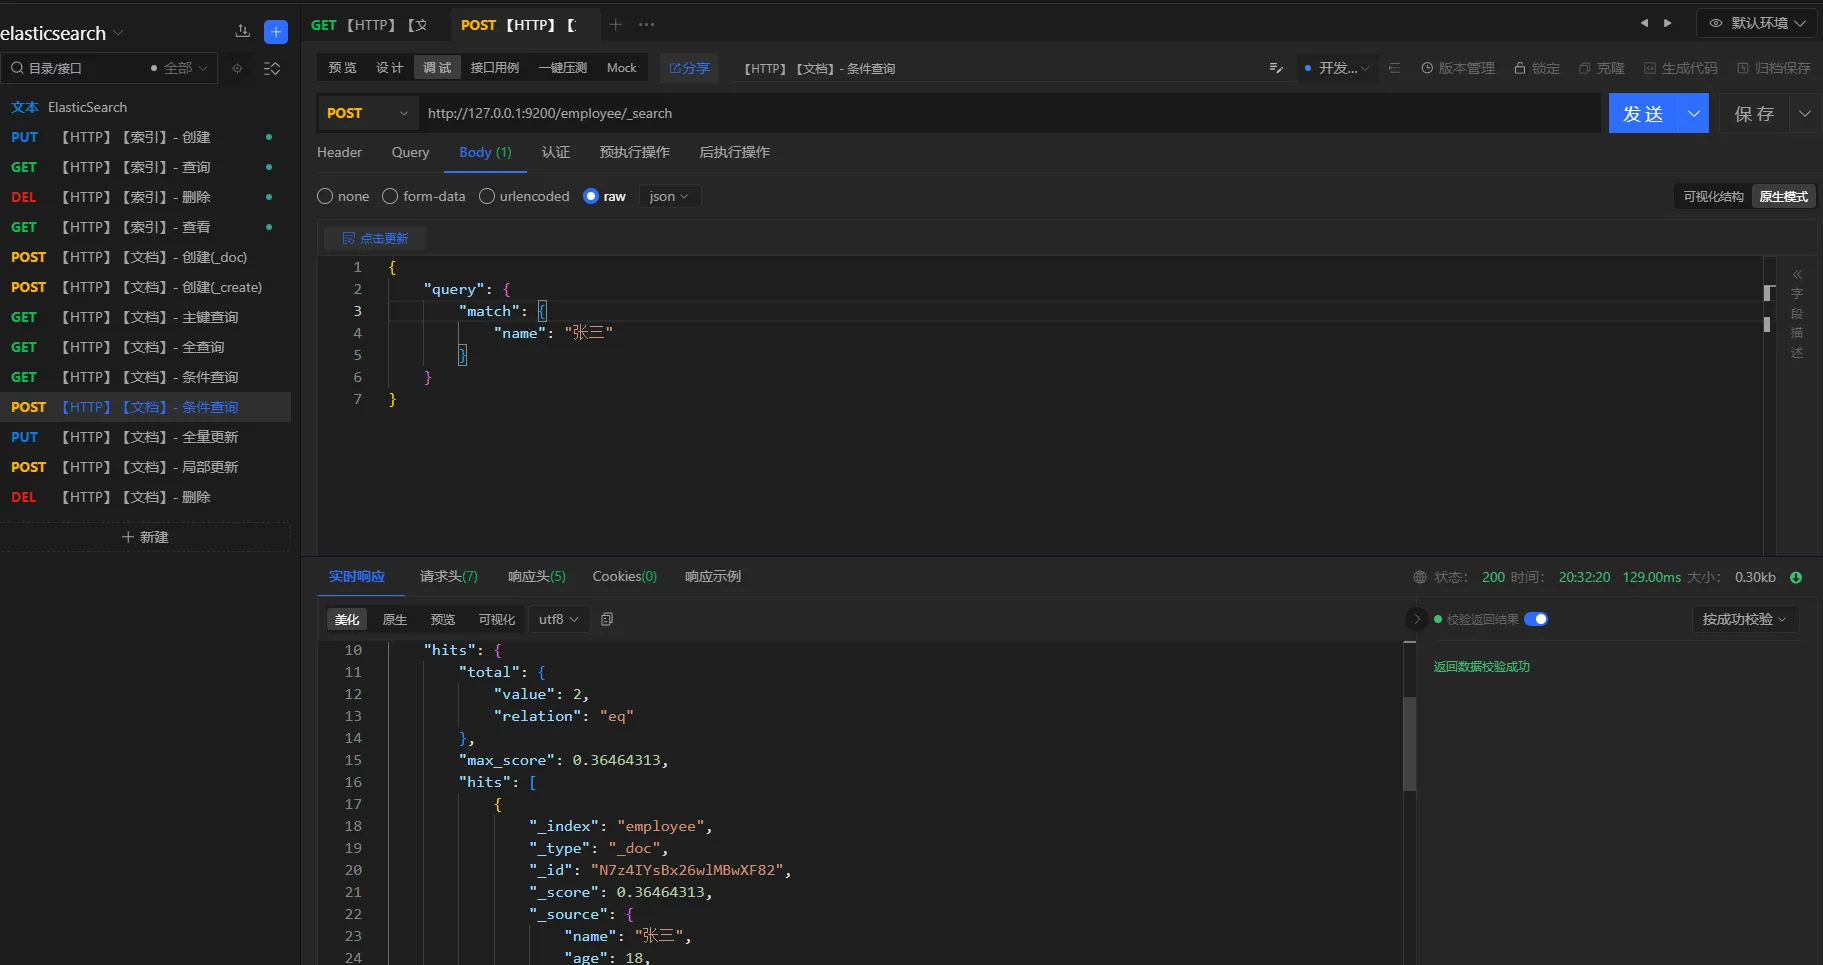
- 方式二
查询条件
查询名称叫张三的所有员工
请求方式
POST
URL
httphttp://127.0.0.1:9200/employee/_search
参数
json{
    "query": {
        "match": {
            "name": "张三"
        }
    }
}
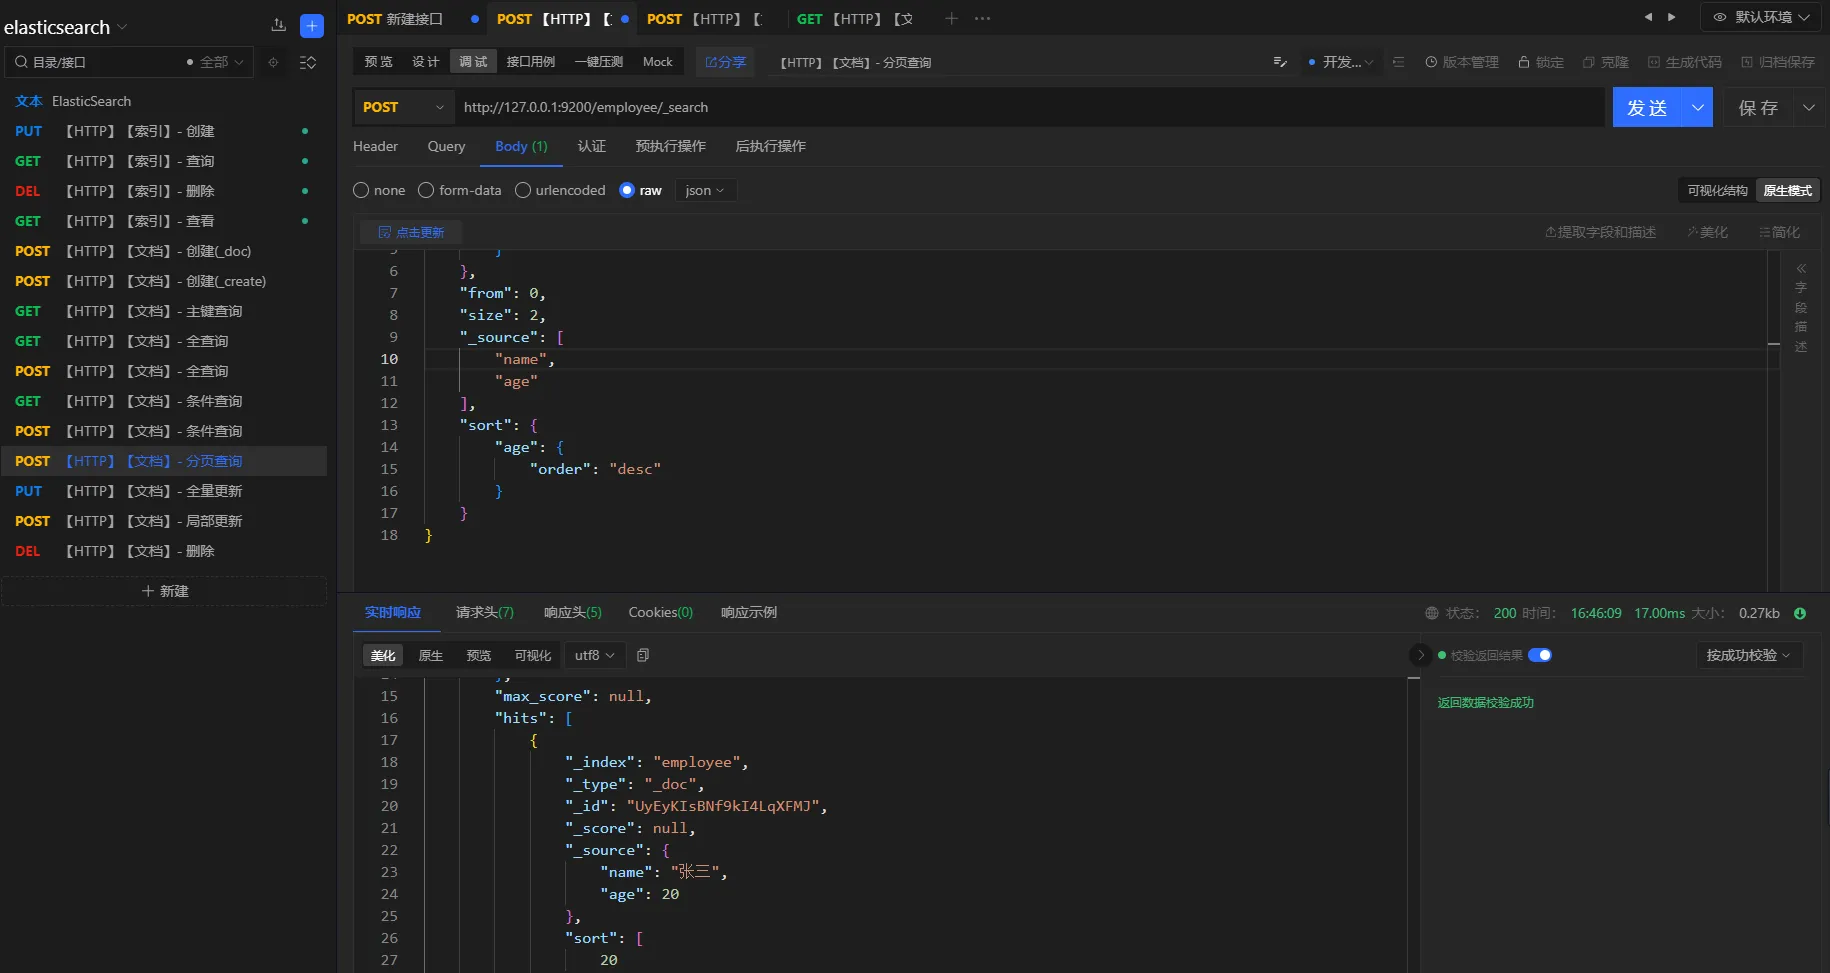
3.5.4 分页查询
提供elasticsearch的分页查询,包括过滤和排序。
-
分页:
from和size配合使用json"from": 0, "size": 2, -
过滤:
_source指定想要返回的字段json"_source": [ "name", "age" ] -
排序:
sort和order配合使用json"sort": { "age": { "order": "desc" } }
查询条件
分页查询名称为张三的员工,分页大小为2,并且根据员工年龄倒序排列,只要名称和年龄属性
请求方式
POST
URL
http://127.0.0.1:9200/employee/_search
参数
json{
    "query": {
        "match": {
            "name": "张三"
        }
    },
    "from": 0,
    "size": 2,
    "_source": [
        "name",
        "age"
    ],
    "sort": {
        "age": {
            "order": "desc"
        }
    }
}
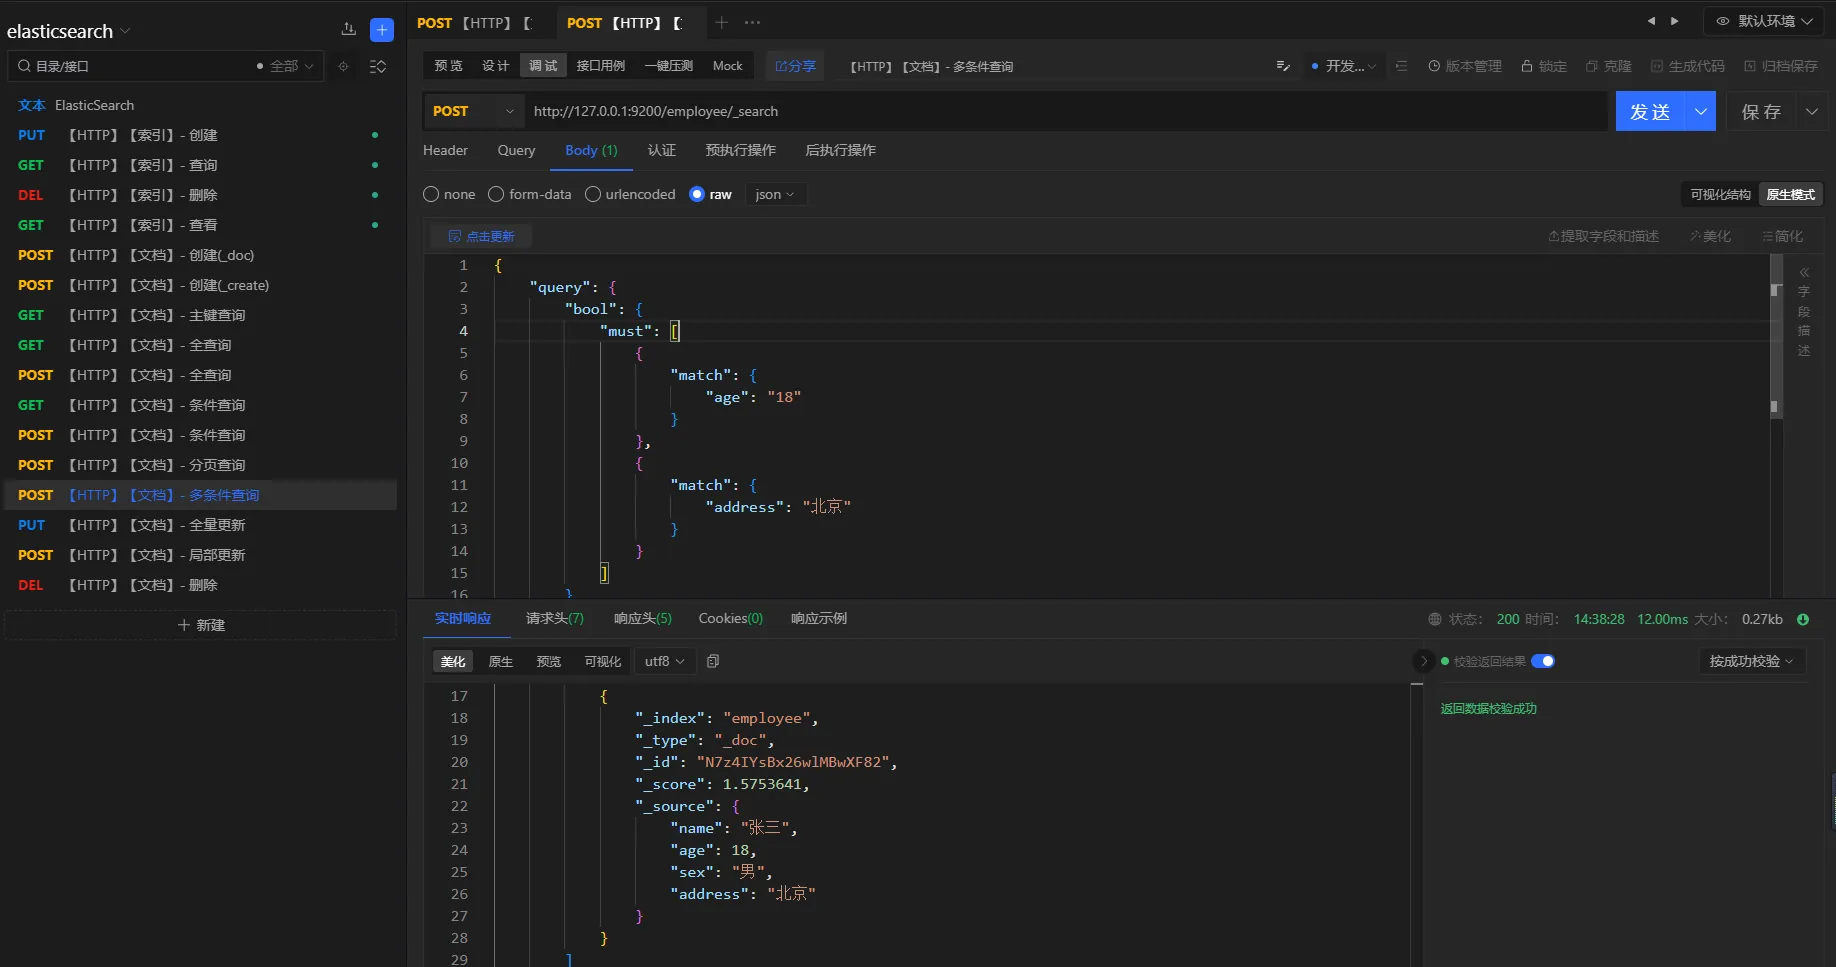
3.5.5 多条件查询
- 且查询
查询条件
查询年龄为18并且地址是北京的员工
查询方式
POST
URL
http://127.0.0.1:9200/employee/_search
参数
json{
    "query": {
        "bool": {
            "must": [
                {
                    "match": {
                        "age": "18"
                    }
                },
                {
                    "match": {
                        "address": "北京"
                    }
                }
            ]
        }
    }
}
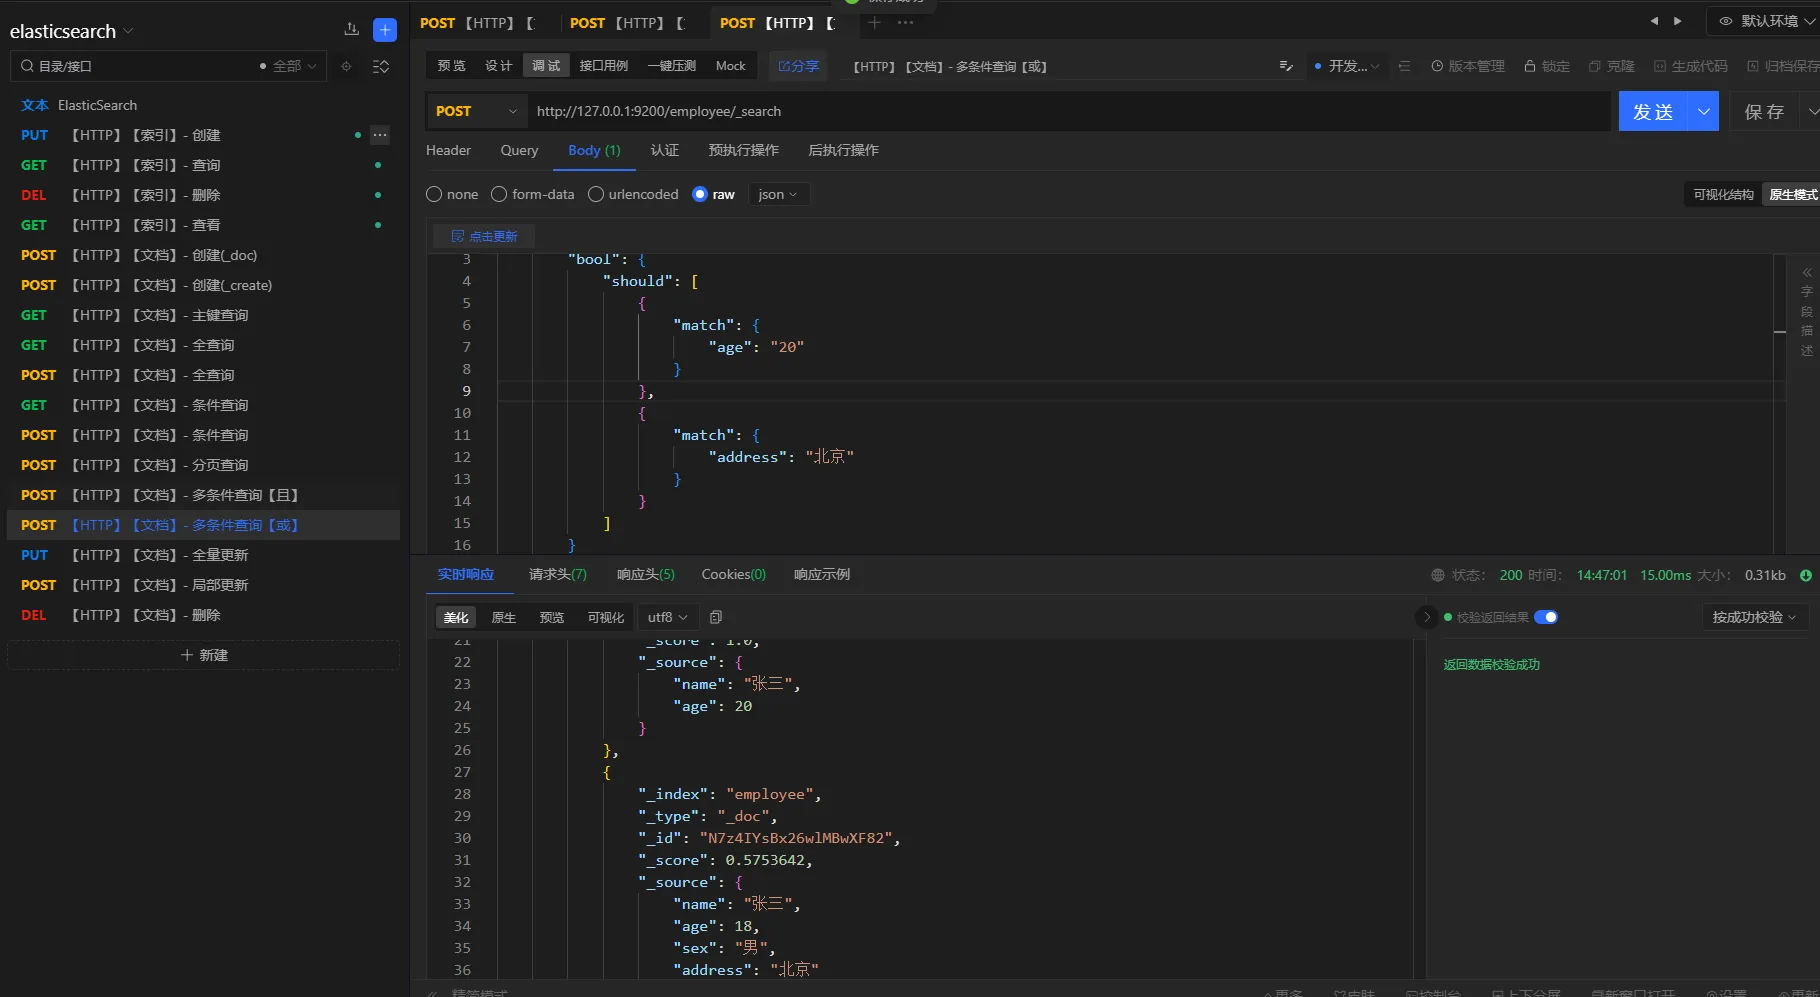
- 或查询
查询条件
查询年龄是地址是北京,或者年龄是20的员工
查询方式
POST
URL
http://127.0.0.1:9200/employee/_search
参数
json{
    "query": {
        "bool": {
            "should": [
                {
                    "match": {
                        "age": "20"
                    }
                },
                {
                    "match": {
                        "address": "北京"
                    }
                }
            ]
        }
    }
}
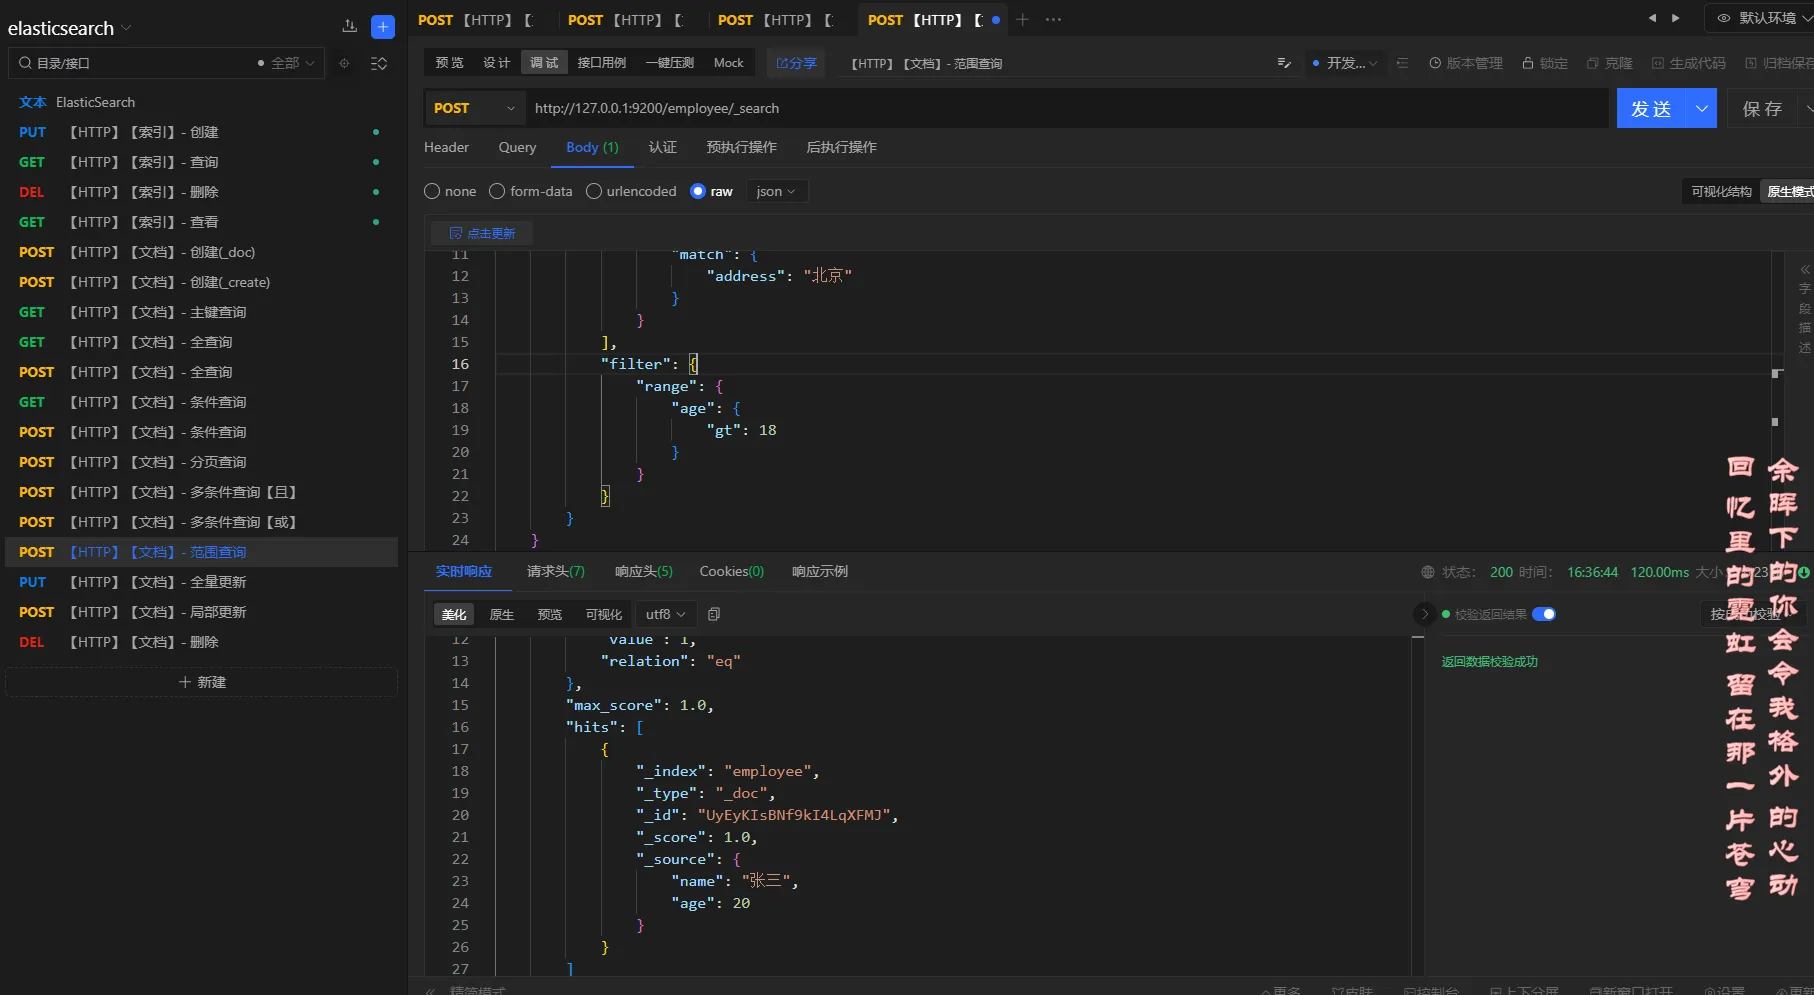
3.5.6 范围查询
elasticsearch范围查询使用 filter、range进行配合。
大于:gt
大于或等于: gte
小于:lt
小于或等于:lte
查询条件
查询姓名叫张三,年龄大于18的员工
请求方式
POST
URL
http://127.0.0.1:9200/employee/_search
参数
json{
    "query": {
        "bool": {
            "should": [
                {
                    "match": {
                        "age": "20"
                    }
                },
                {
                    "match": {
                        "address": "北京"
                    }
                }
            ],
            "filter": {
                "range": {
                    "age": {
                        "gt": 18
                    }
                }
            }
        }
    }
}
3.5.7 全文检索
elasticsearch默认会对文本进行分词
查询条件
查询名称是张李的员工
查询方式
POST
URL
http://127.0.0.1:9200/employee/_search
参数
json{
    "query": {
        "bool": {
            "should": [
                {
                    "match": {
                        "name": "张李"
                    }
                }
            ]
        }
    }
}
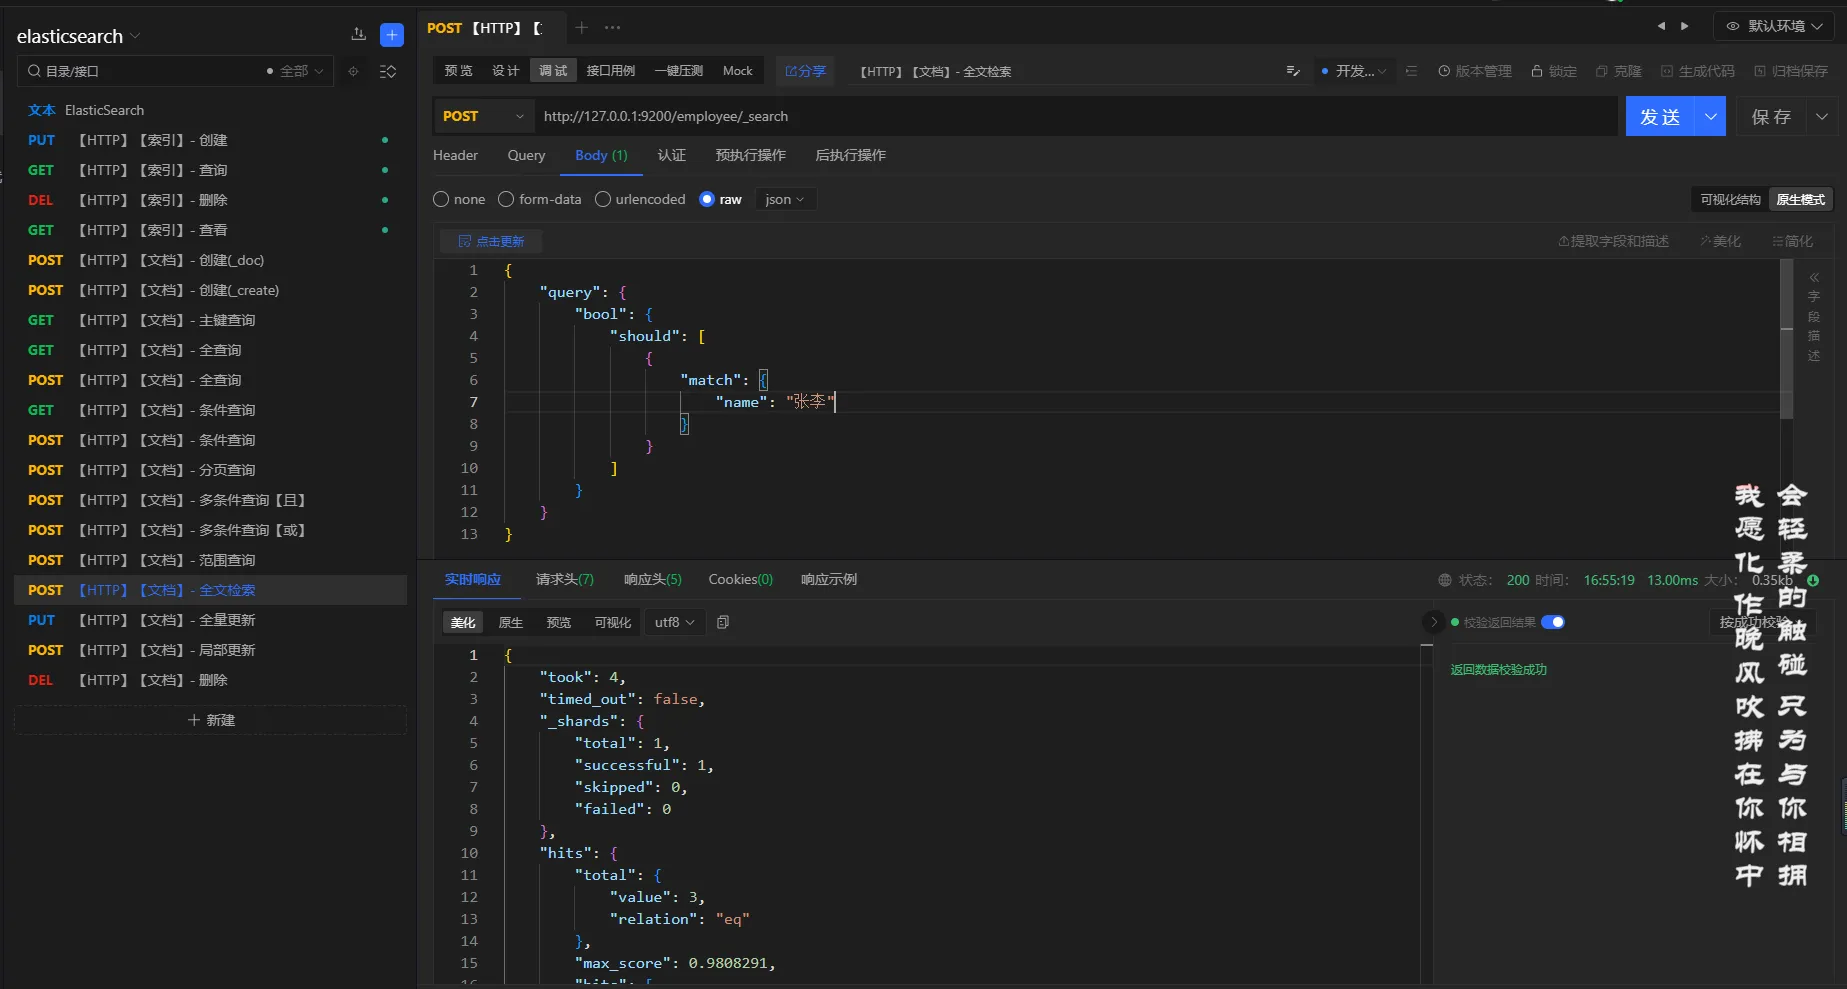
分析
对张李进行分词,得到:张、李,然后根据倒排索引去查询,最后得到名称中有张、李的员工信息
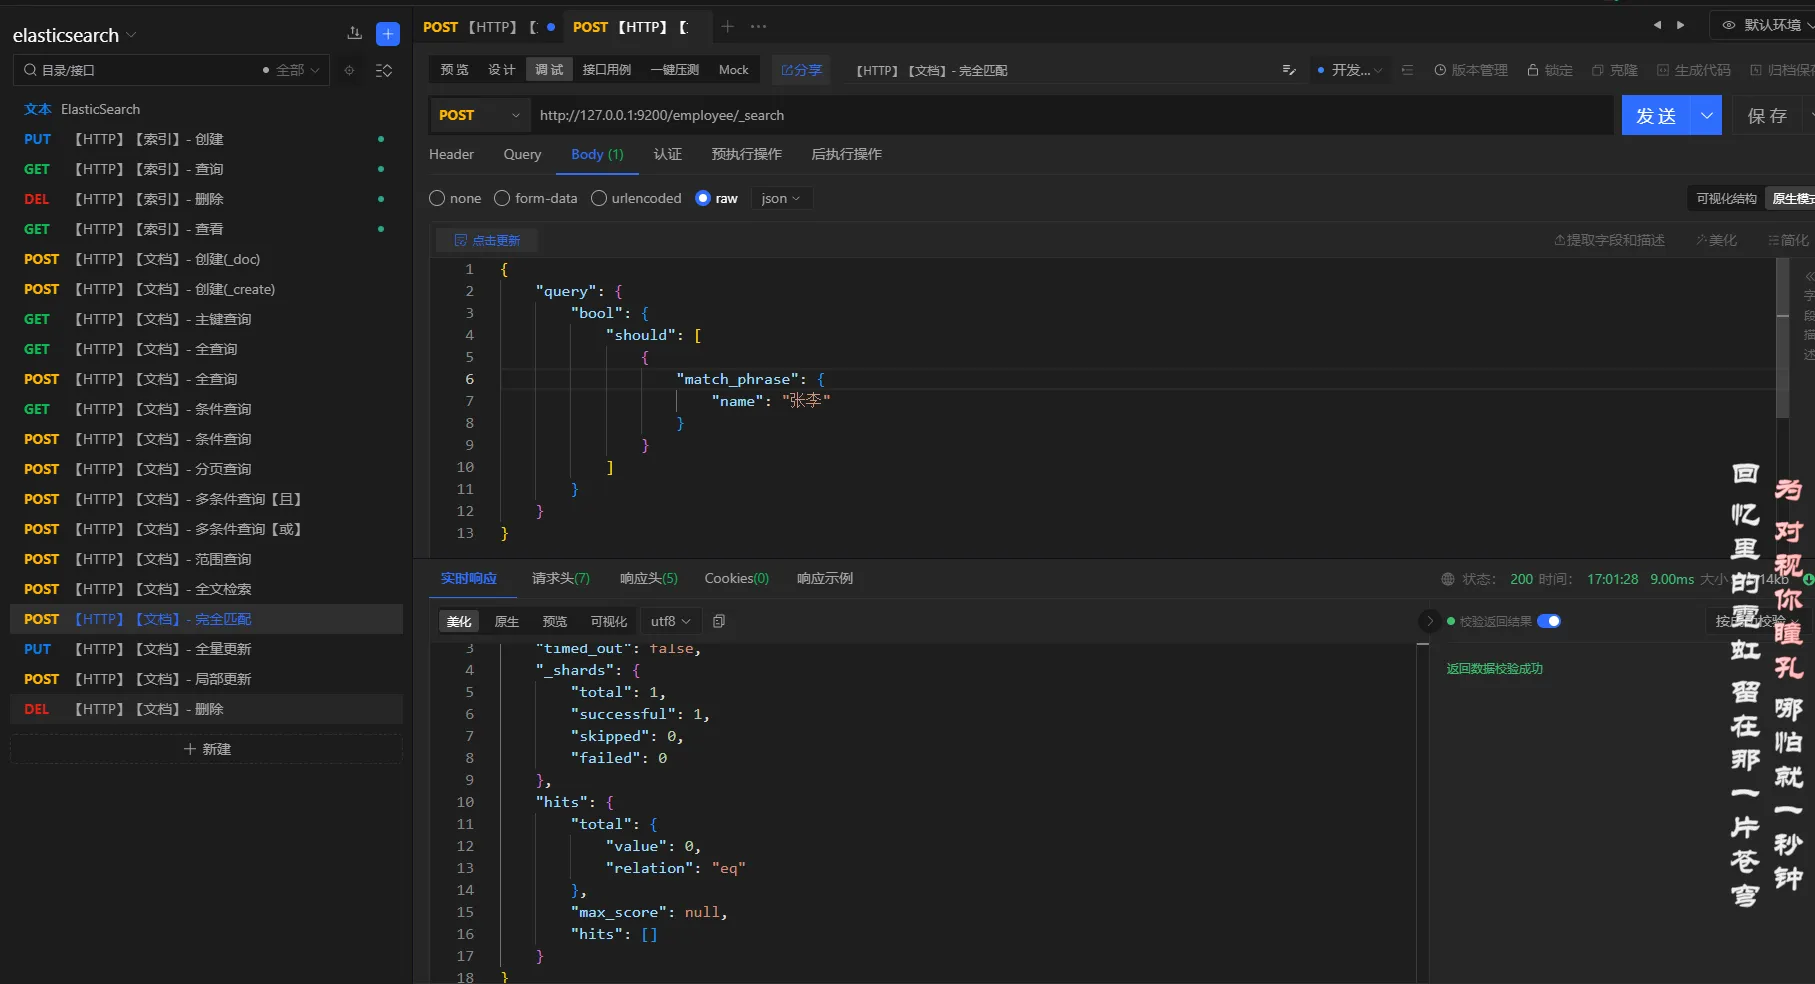
3.5.8 完全匹配
elasticsearch使用match_pharse或者term来实现完全匹配
查询条件
查询名称是张李的员工
查询方式
POST
URL
http://127.0.0.1:9200/employee/_search
参数
json{
    "query": {
        "bool": {
            "should": [
                {
                    "match_phrase": {
                        "name": "张李"
                    }
                }
            ]
        }
    }
}
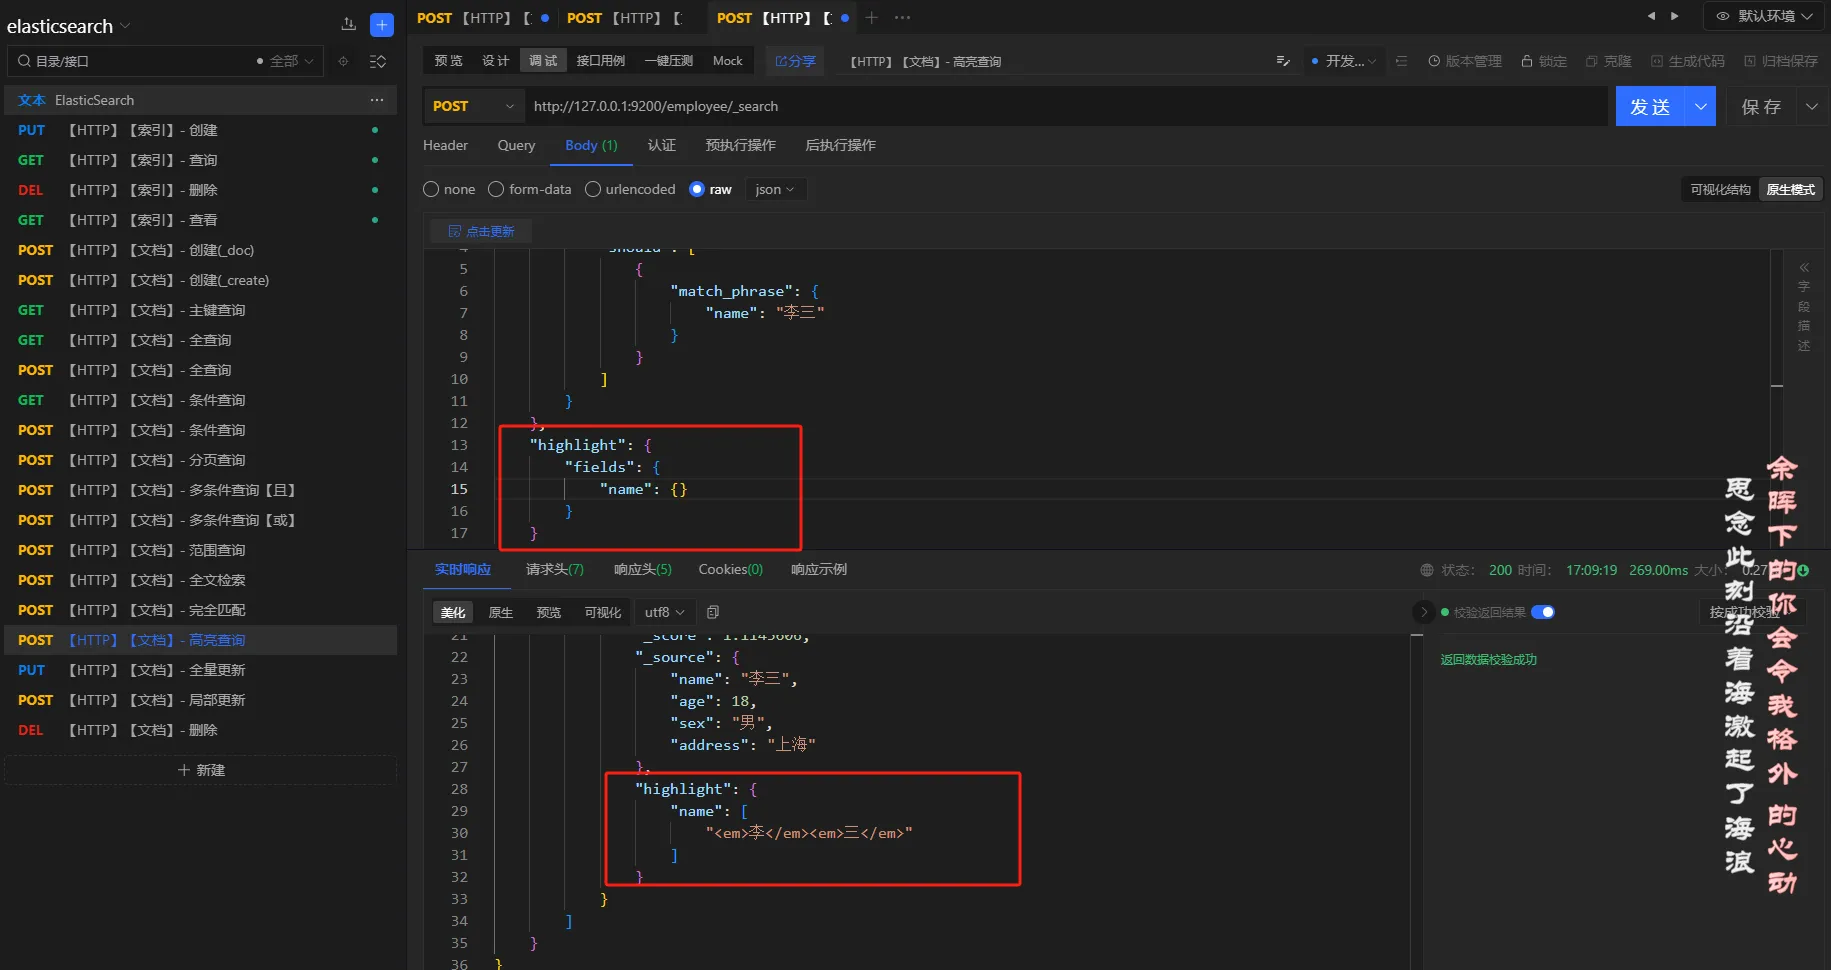
3.5.9 高亮查询
查询条件
查询名称是李三的员工,并且高亮名称
查询方式
POST
URL
http://127.0.0.1:9200/employee/_search
参数
json{
    "query": {
        "bool": {
            "should": [
                {
                    "match_phrase": {
                        "name": "李三"
                    }
                }
            ]
        }
    },
    "highlight": {
        "fields": {
            "name": {}
        }
    }
}
3.5.10 聚合查询
- 分组
查询条件
查询员工,根据年龄分组
查询方式
POST
URL
http://127.0.0.1:9200/employee/_search
参数
json{
    "aggs": {
        "age_group": {
            "terms": {
                "field": "age"
            }
        }
    }
}
结果
json{
    "took": 7,
    "timed_out": false,
    "_shards": {
        "total": 1,
        "successful": 1,
        "skipped": 0,
        "failed": 0
    },
    "hits": {
        "total": {
            "value": 3,
            "relation": "eq"
        },
        "max_score": 1.0,
        "hits": [
            {
                "_index": "employee",
                "_type": "_doc",
                "_id": "N7z4IYsBx26wlMBwXF82",
                "_score": 1.0,
                "_source": {
                    "name": "张三",
                    "age": 18,
                    "sex": "男",
                    "address": "北京"
                }
            },
            {
                "_index": "employee",
                "_type": "_doc",
                "_id": "UyEyKIsBNf9kI4LqXFMJ",
                "_score": 1.0,
                "_source": {
                    "name": "张三",
                    "age": 20
                }
            },
            {
                "_index": "employee",
                "_type": "_doc",
                "_id": "1001",
                "_score": 1.0,
                "_source": {
                    "name": "李三",
                    "age": 18,
                    "sex": "男",
                    "address": "上海"
                }
            }
        ]
    },
    "aggregations": {
        "age_group": {
            "doc_count_error_upper_bound": 0,
            "sum_other_doc_count": 0,
            "buckets": [
                {
                    "key": 18,
                    "doc_count": 2
                },
                {
                    "key": 20,
                    "doc_count": 1
                }
            ]
        }
    }
}
注意:
查询结果可以使用
size: 0进行过滤,只保留分组信息;如下:参数
{ "aggs": { "age_group": { "terms": { "field": "age" } } }, "size": 0 }结果
{ "took": 84, "timed_out": false, "_shards": { "total": 1, "successful": 1, "skipped": 0, "failed": 0 }, "hits": { "total": { "value": 3, "relation": "eq" }, "max_score": null, "hits": [] }, "aggregations": { "age_group": { "doc_count_error_upper_bound": 0, "sum_other_doc_count": 0, "buckets": [ { "key": 18, "doc_count": 2 }, { "key": 20, "doc_count": 1 } ] } } }
- 平均值
查询条件
求员工年龄的平均值
请求方式
POST
URL
http://127.0.0.1:9200/employee/_search
参数
json{
    "aggs": {
        "age_avg": {
            "avg": {
                "field": "age"
            }
        }
    }
}
结果
json{
    "took": 3,
    "timed_out": false,
    "_shards": {
        "total": 1,
        "successful": 1,
        "skipped": 0,
        "failed": 0
    },
    "hits": {
        "total": {
            "value": 3,
            "relation": "eq"
        },
        "max_score": 1.0,
        "hits": [
            {
                "_index": "employee",
                "_type": "_doc",
                "_id": "N7z4IYsBx26wlMBwXF82",
                "_score": 1.0,
                "_source": {
                    "name": "张三",
                    "age": 18,
                    "sex": "男",
                    "address": "北京"
                }
            },
            {
                "_index": "employee",
                "_type": "_doc",
                "_id": "UyEyKIsBNf9kI4LqXFMJ",
                "_score": 1.0,
                "_source": {
                    "name": "张三",
                    "age": 20
                }
            },
            {
                "_index": "employee",
                "_type": "_doc",
                "_id": "1001",
                "_score": 1.0,
                "_source": {
                    "name": "李三",
                    "age": 18,
                    "sex": "男",
                    "address": "上海"
                }
            }
        ]
    },
    "aggregations": {
        "age_avg": {
            "value": 18.666666666666668
        }
    }
}
3.6 映射
elasticsearch的映射,本节通过创建索引、创建映射、创建文档、查询一系列操作来进行映射的演示。创建文档之后,通过查询来演示一下映射的效果。
需要:
-
- 创建索引:
person - 创建映射:满足一下条件
- 包含属性名称
name,可以被索引、模糊匹配 - 包含属性年龄
age,可以被索引、精确匹配 - 包含属性地址
address,可以被索引、模糊匹配 - 包含属性手机号
tel,不可以被索引
- 包含属性名称
- 查询
- 创建索引:
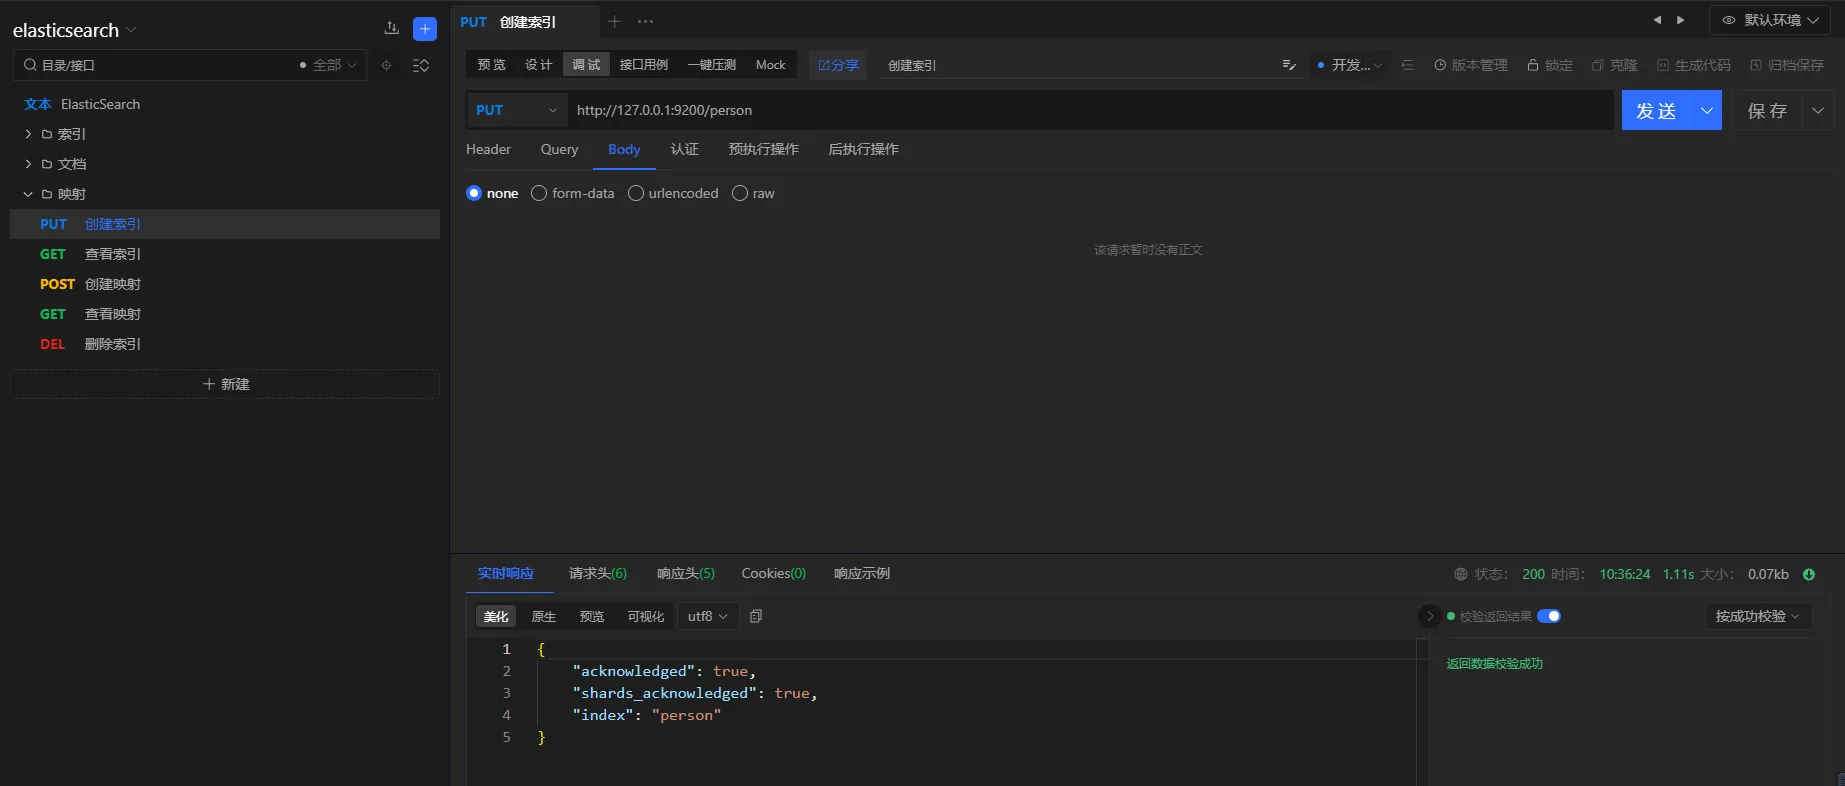
3.6.1 创建索引
请求i方式
PUT
URL
http://127.0.0.1:9200/person
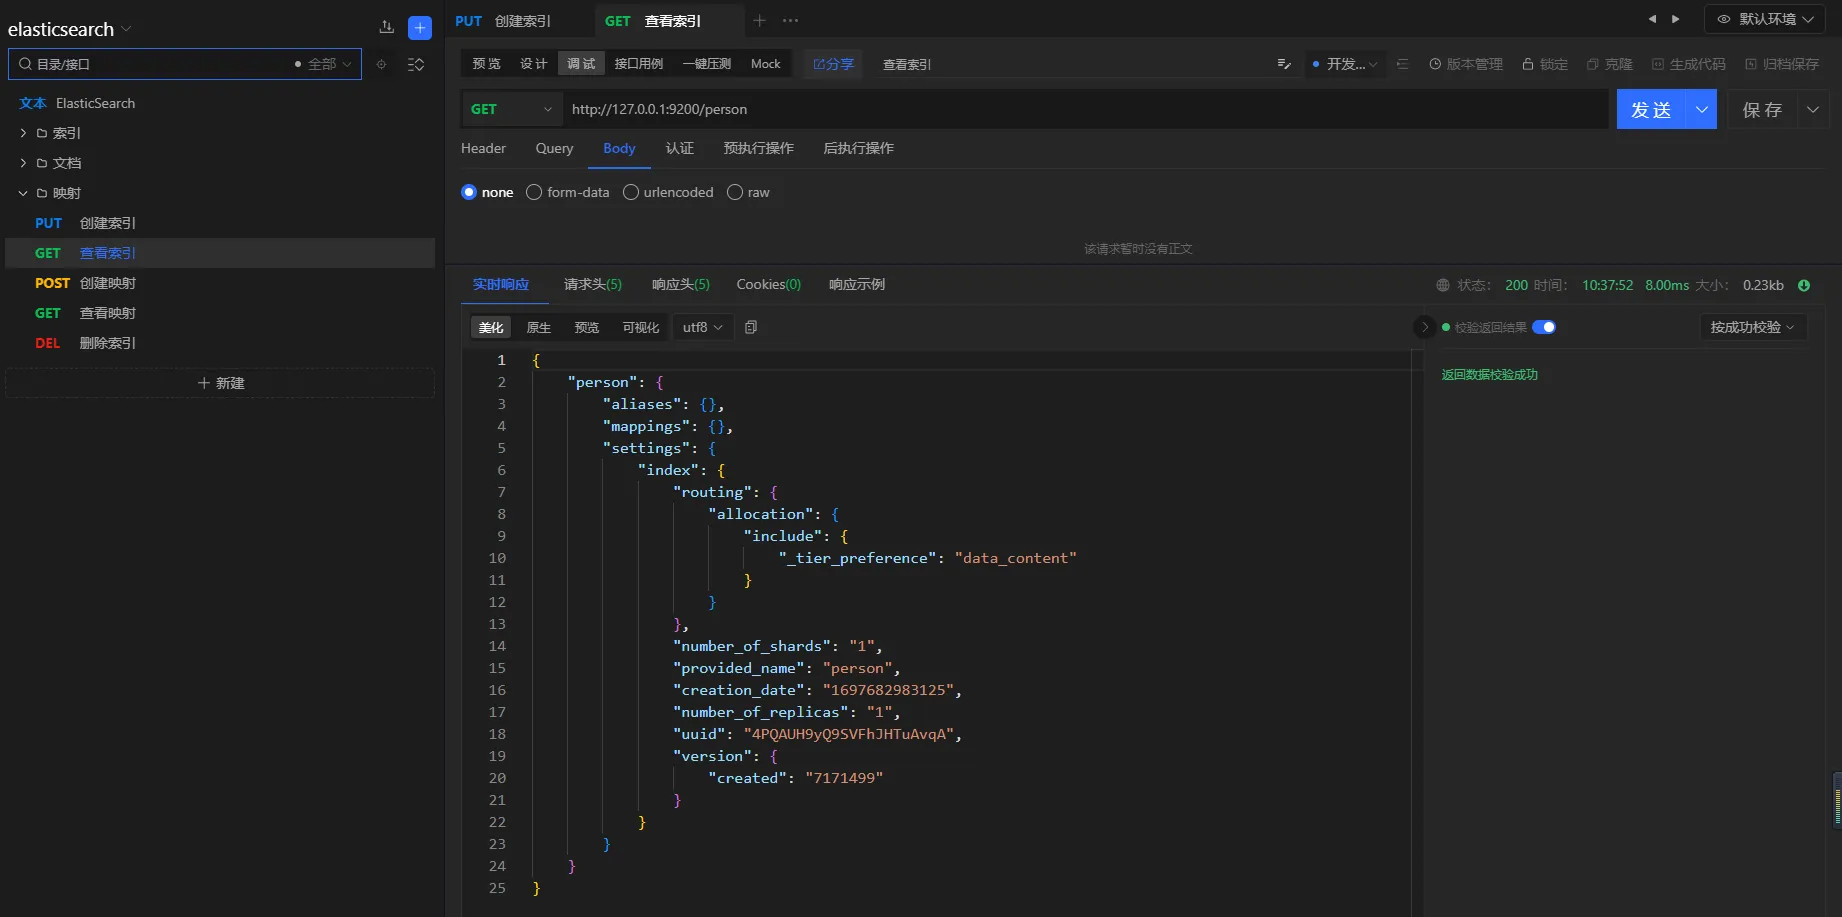
3.6.2 查看索引
请求方式
GET
URL
http://127.0.0.1:9200/person
3.6.3 创建映射
请求方式
POST
URL
http://127.0.0.1:9200/person/_mapping
参数
json{
    "properties": {
        "name": {
            "type": "text",
            "index": true
        },
        "age": {
            "type": "keyword",
            "index": true
        },
        "address": {
            "type": "text",
            "index": true
        },
        "tel": {
            "type": "keyword",
            "index": false
        }
    }
}

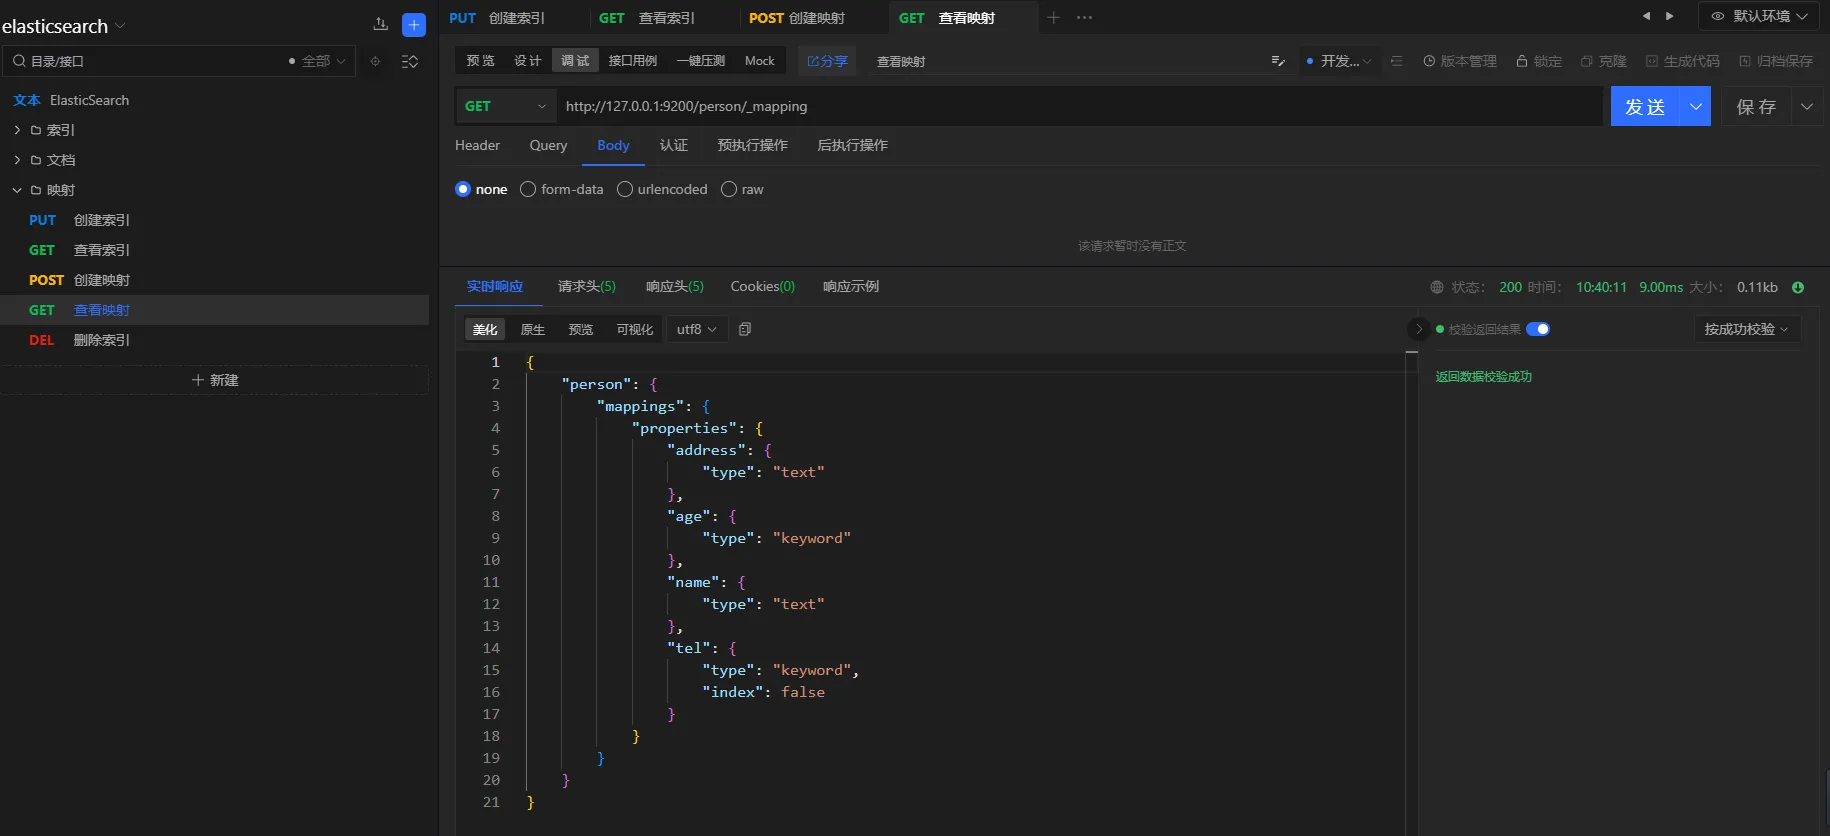
3.6.4 查看映射
请求方式
GET
URL
http://127.0.0.1:9200/person/_mapping
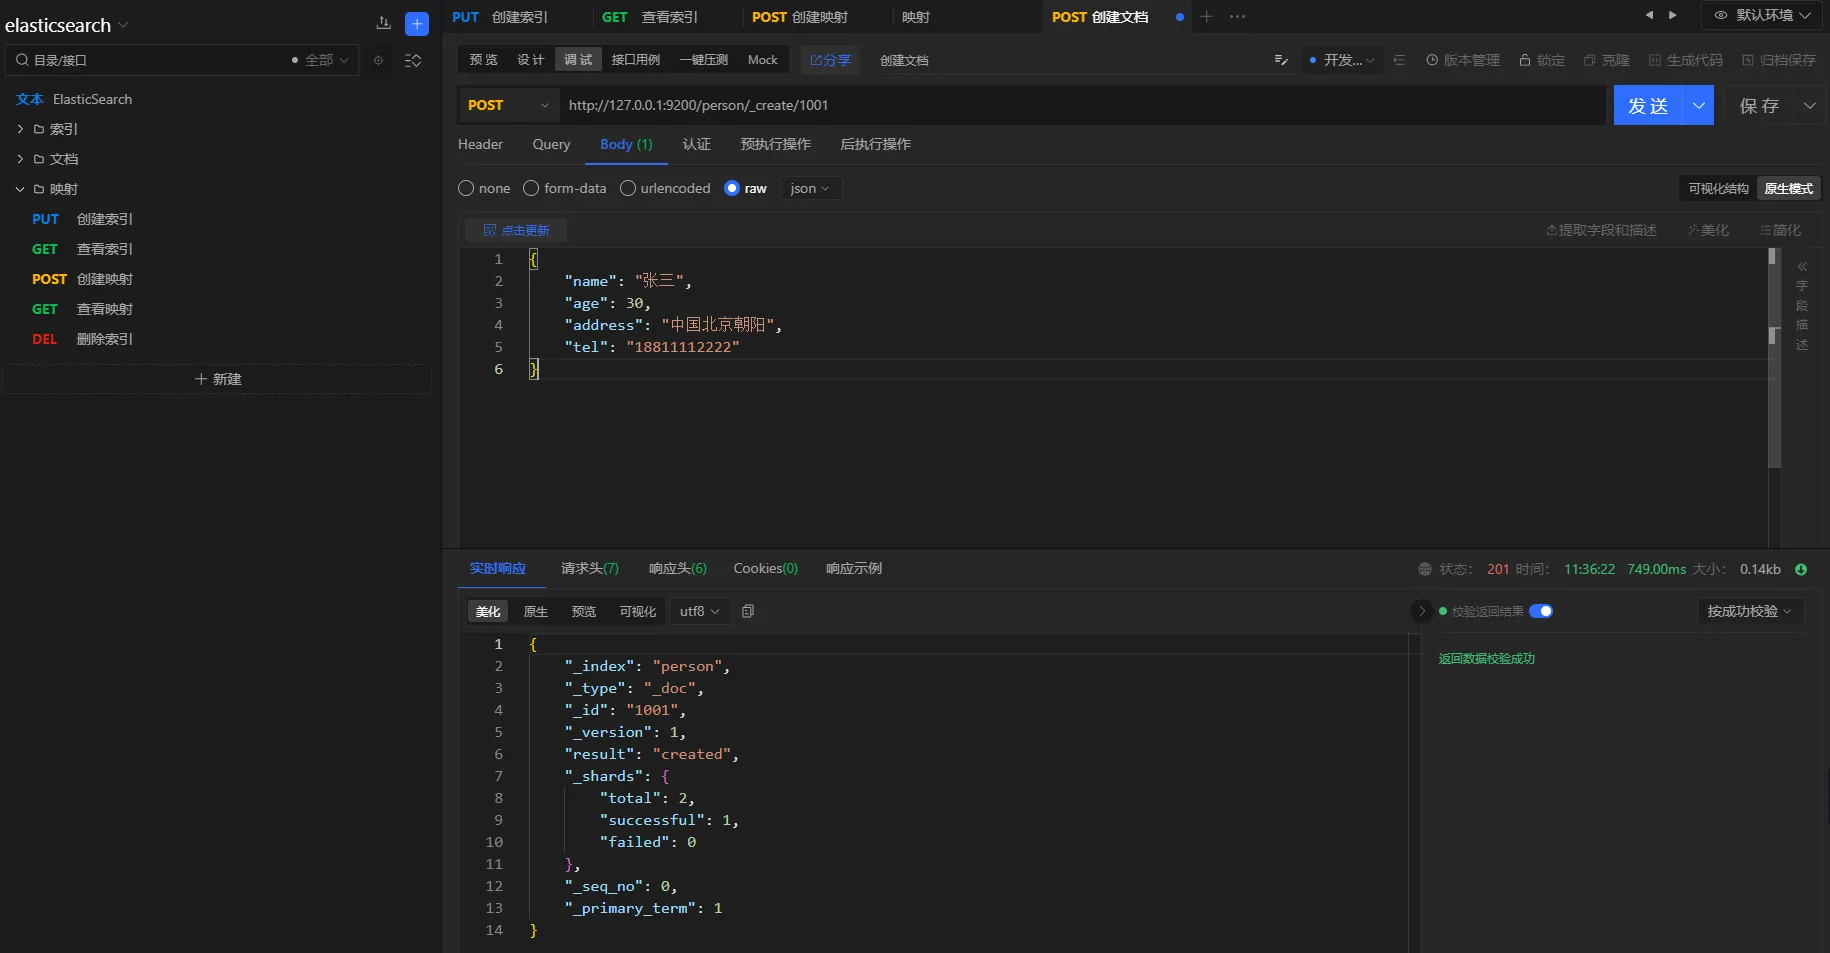
3.6.5 创建文档
请求方式
POST
URL
http://127.0.0.1:9200/person/_create/1001
参数
json{
    "name": "张三",
    "age": 30,
    "address": "中国北京朝阳",
    "tel": "18811112222"
}
3.6.6 查询验证
TEXT类型属性
TEXT类型的属性会进行分词处理,支持模糊匹配
查询条件
查询地点在中国的人
请求方式
POST
URL
http://127.0.0.1:9200/person/_search
参数
json{
    "query": {
        "match": {
            "address": "中国"
        }
    }
}
结果
json{
    "took": 7,
    "timed_out": false,
    "_shards": {
        "total": 1,
        "successful": 1,
        "skipped": 0,
        "failed": 0
    },
    "hits": {
        "total": {
            "value": 2,
            "relation": "eq"
        },
        "max_score": 0.39713606,
        "hits": [
            {
                "_index": "person",
                "_type": "_doc",
                "_id": "1002",
                "_score": 0.39713606,
                "_source": {
                    "name": "李三",
                    "age": 20,
                    "address": "中国上海",
                    "tel": "18866668888"
                }
            },
            {
                "_index": "person",
                "_type": "_doc",
                "_id": "1001",
                "_score": 0.3370651,
                "_source": {
                    "name": "张三",
                    "age": 30,
                    "address": "中国北京朝阳",
                    "tel": "18811112222"
                }
            }
        ]
    }
}
- keyword属性
keywork类型的属性,不会进行分词,精确匹配。
查询条件
查询年龄是20岁的人
查询方式
POST
URL
http://127.0.0.1:9200/person/_search
参数
json{
    "query": {
        "match": {
            "age": 20
        }
    }
}
结果
json{
    "took": 2,
    "timed_out": false,
    "_shards": {
        "total": 1,
        "successful": 1,
        "skipped": 0,
        "failed": 0
    },
    "hits": {
        "total": {
            "value": 1,
            "relation": "eq"
        },
        "max_score": 0.6931471,
        "hits": [
            {
                "_index": "person",
                "_type": "_doc",
                "_id": "1002",
                "_score": 0.6931471,
                "_source": {
                    "name": "李三",
                    "age": 20,
                    "address": "中国上海",
                    "tel": "18866668888"
                }
            }
        ]
    }
}
- 非索引属性
elasticsearch非索引属性不支持搜索
查询条件
查询手机号为18866668888的用户
查询方式
POST
URL
http://127.0.0.1:9200/person/_search
参数
json{
    "query": {
        "match": {
            "tel": "18866668888"
        }
    }
}
结果
json{
    "error": {
        "root_cause": [
            {
                "type": "query_shard_exception",
                "reason": "failed to create query: Cannot search on field [tel] since it is not indexed.",
                "index_uuid": "4PQAUH9yQ9SVFhJHTuAvqA",
                "index": "person"
            }
        ],
        "type": "search_phase_execution_exception",
        "reason": "all shards failed",
        "phase": "query",
        "grouped": true,
        "failed_shards": [
            {
                "shard": 0,
                "index": "person",
                "node": "YeSSgQayQzqCuyonCFDH9w",
                "reason": {
                    "type": "query_shard_exception",
                    "reason": "failed to create query: Cannot search on field [tel] since it is not indexed.",
                    "index_uuid": "4PQAUH9yQ9SVFhJHTuAvqA",
                    "index": "person",
                    "caused_by": {
                        "type": "illegal_argument_exception",
                        "reason": "Cannot search on field [tel] since it is not indexed."
                    }
                }
            }
        ]
    },
    "status": 400
}
分析
由于在创建映射时,tel属性设置的index为false,因此该属性不支持检索
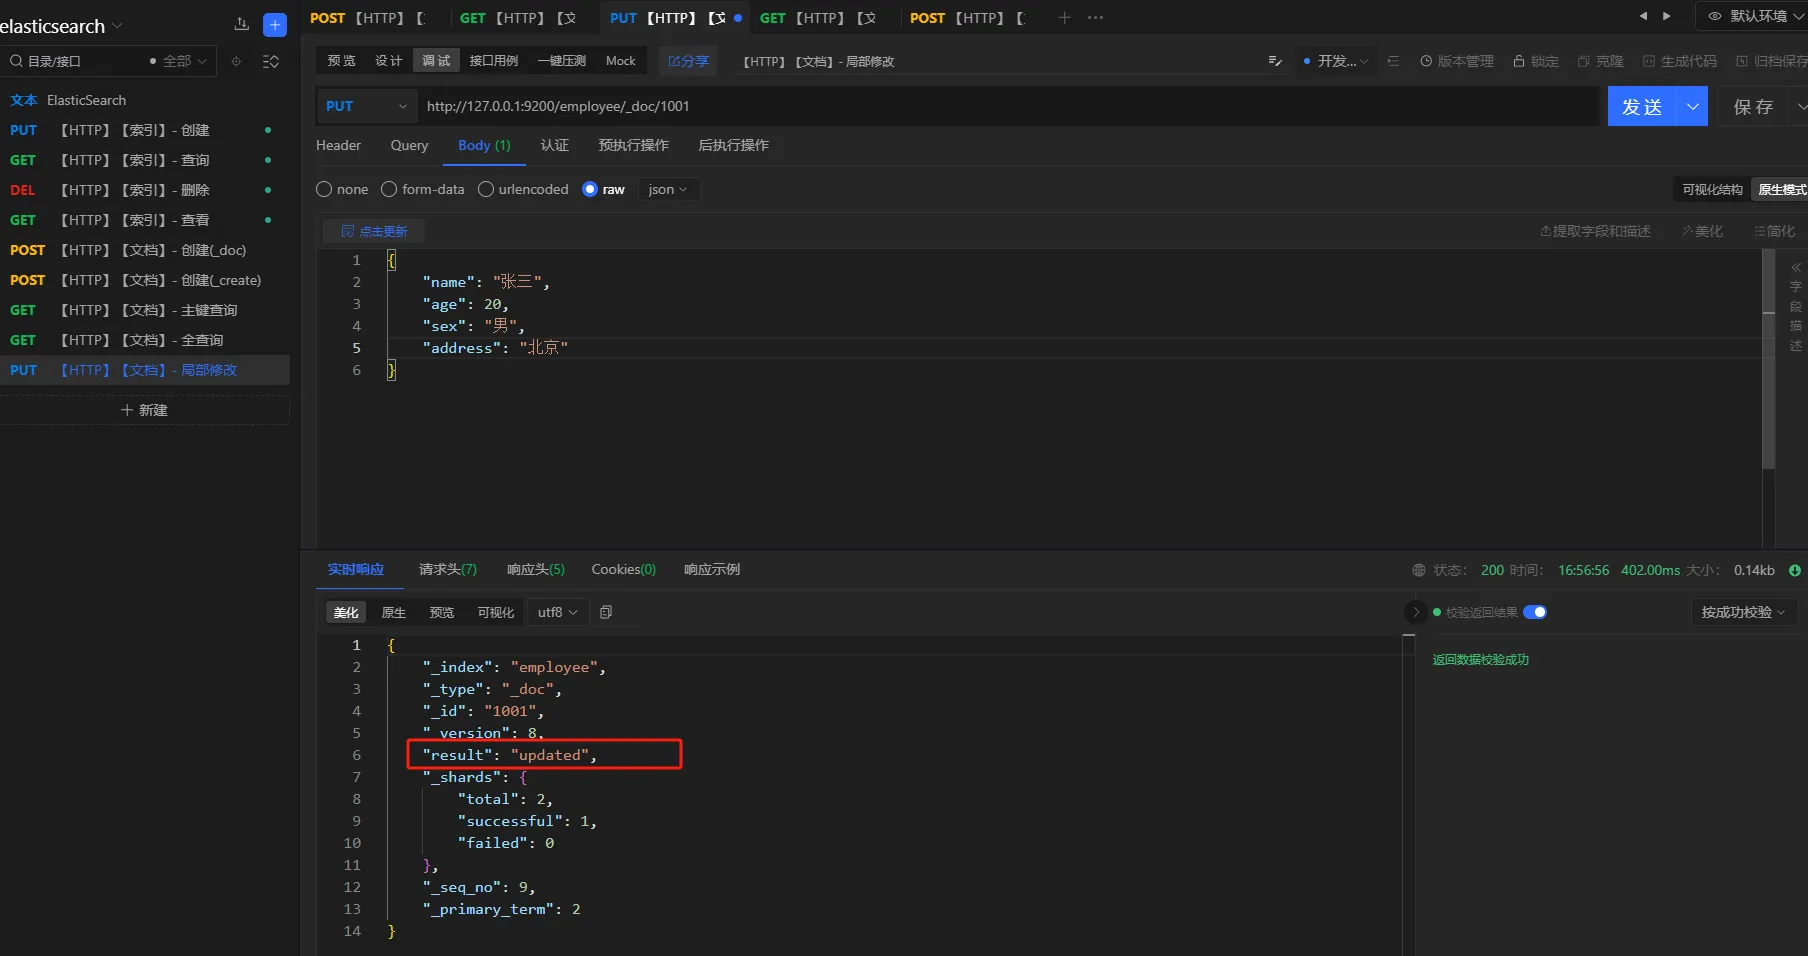
3.7 更新
提供文档修改的常用操作。包括:全量更新、局部更新。全量更新使用PUT,局部更新使用POST
3.7.1 全量更新
请求方式
post/put
URL
http://127.0.0.1:9200/employee/_doc/1001
参数
json{
    "name": "张三",
    "age": 20,
    "sex": "男",
    "address": "北京"
}
3.8 删除
提供文档的删除操作
请求方式
delete
URL
http://127.0.0.1:9200/employee/_doc/1001
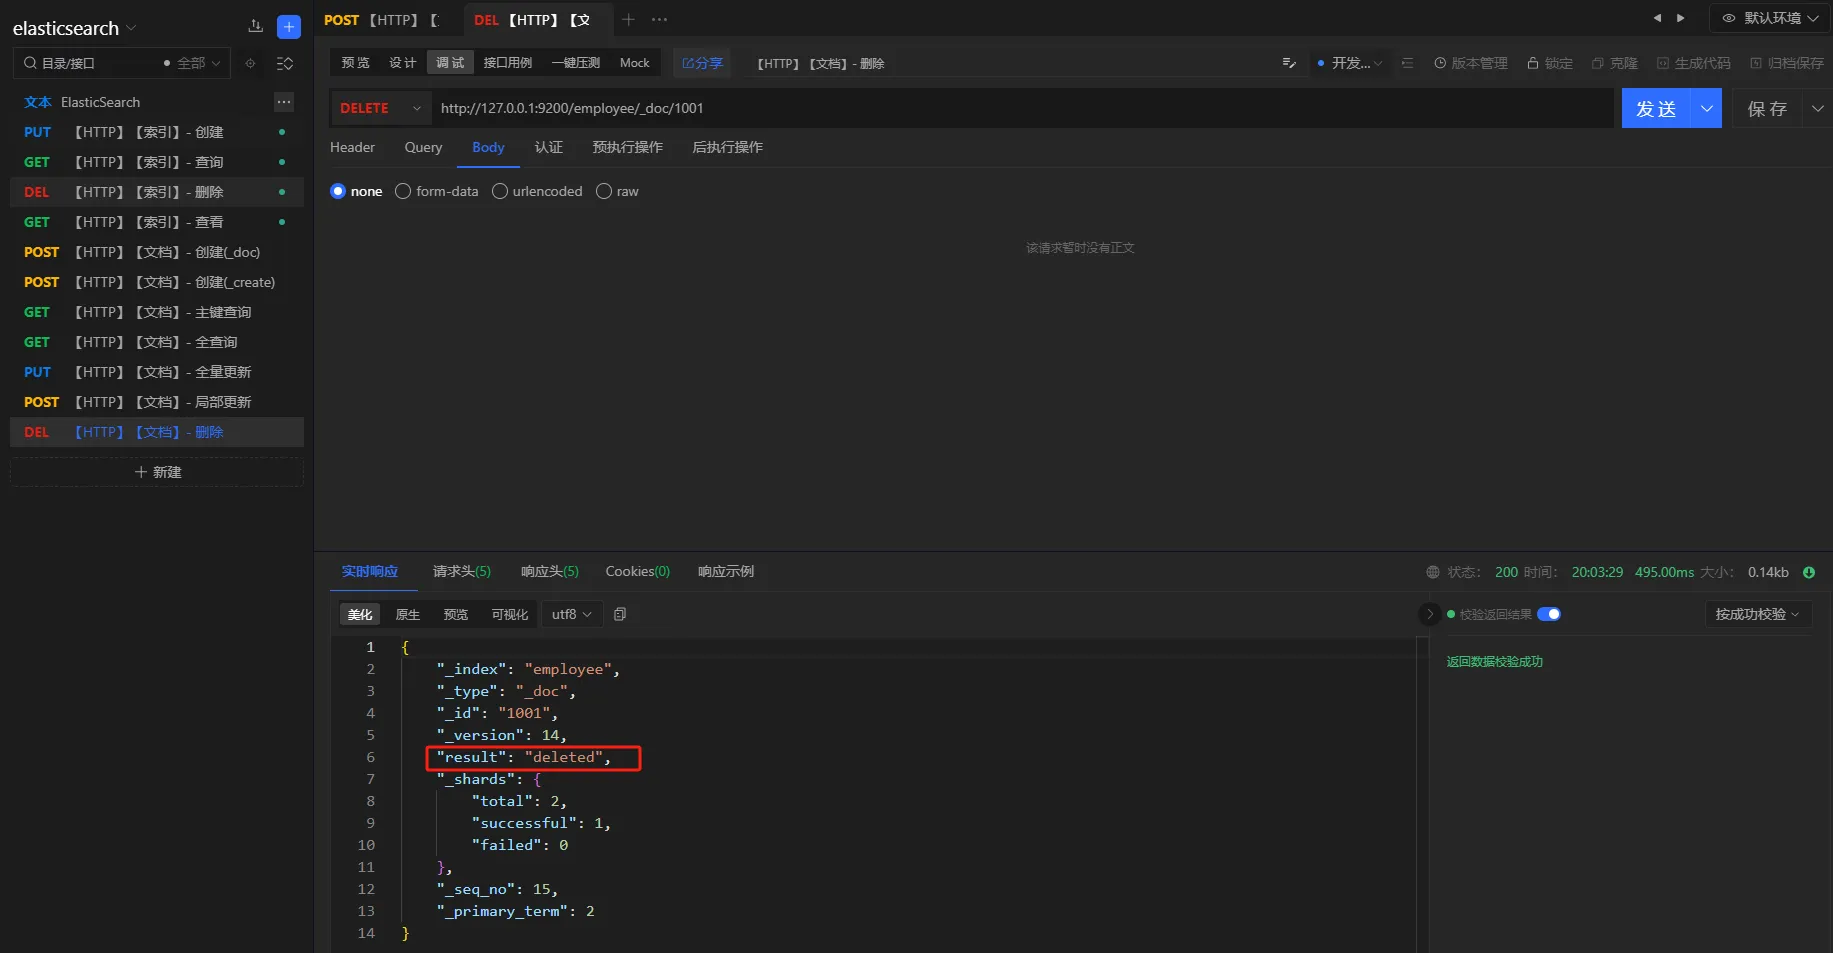
删除之后,重新执行查询进行验证
4. 进阶
4.1 HTTP
本章主要介绍 集群 环境下的HTTP操作
4.1.1 索引 - 新建
新建
创建索引时指定分片和副本,默认一个分片,一个副本
-
number_of_shards: 分片数量 -
number_of_replicas: 副本数量
请求方式
PUT
URL
localhost:9200/user
参数
json{
    "settings": {
        "number_of_shards": 3,
        "number_of_replicas": 1
    }
}
结果
json{
    "acknowledged": true,
    "shards_acknowledged": true,
    "index": "user"
}
验证
执行get请求,查看索引
请求方式
GET
URL
localhost:9200/get
结果
json{
    "user": {
        "aliases": {},
        "mappings": {},
        "settings": {
            "index": {
                "routing": {
                    "allocation": {
                        "include": {
                            "_tier_preference": "data_content"
                        }
                    }
                },
                "number_of_shards": "3",
                "provided_name": "user",
                "creation_date": "1699346545967",
                "number_of_replicas": "1",
                "uuid": "0MoJ82zDSBC7eFqxLgJ3Sg",
                "version": {
                    "created": "7171499"
                }
            }
        }
    }
}
集群
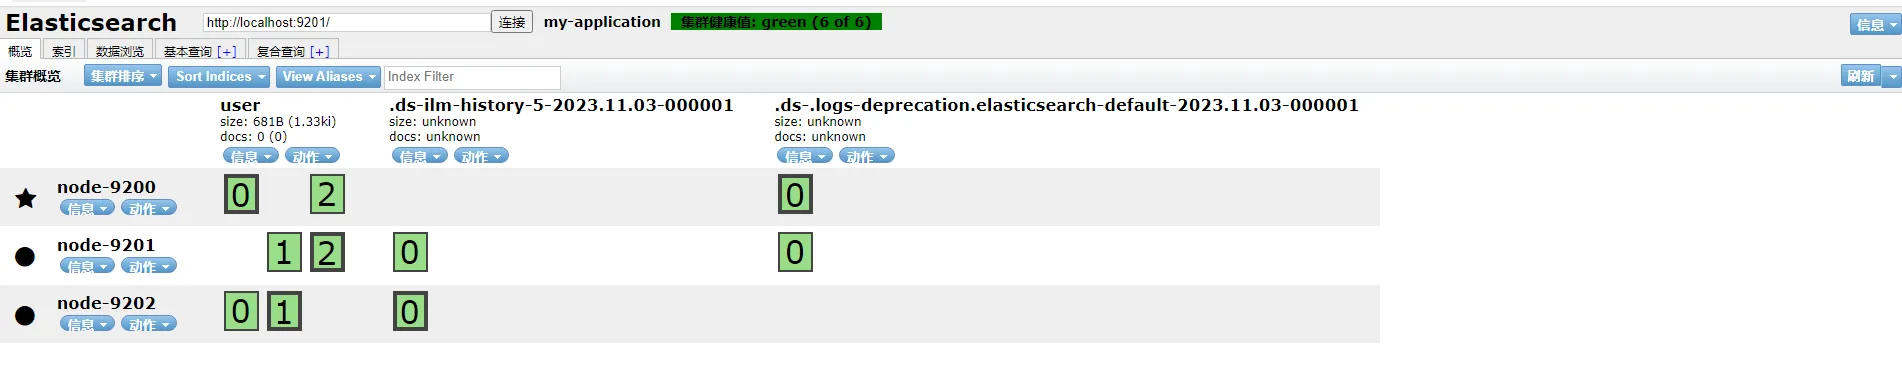
说明
- 带星号的节点是主节点
- 一共三个分片,每个分片一个fu'be

4.2 JAVA API
4.3 分词器
文章节我们使用analyze API来进行分词器学习。默认使用 standard分词器
请求
http://127.0.0.1:9200/_analyze
参数
json{
    "text":"我是中国人",
    "analyzer":"standard"
}
结果
json{
    "tokens": [
        {
            "token": "我",
            "start_offset": 0,
            "end_offset": 1,
            "type": "<IDEOGRAPHIC>",
            "position": 0
        },
        {
            "token": "是",
            "start_offset": 1,
            "end_offset": 2,
            "type": "<IDEOGRAPHIC>",
            "position": 1
        },
        {
            "token": "中",
            "start_offset": 2,
            "end_offset": 3,
            "type": "<IDEOGRAPHIC>",
            "position": 2
        },
        {
            "token": "国",
            "start_offset": 3,
            "end_offset": 4,
            "type": "<IDEOGRAPHIC>",
            "position": 3
        },
        {
            "token": "人",
            "start_offset": 4,
            "end_offset": 5,
            "type": "<IDEOGRAPHIC>",
            "position": 4
        }
    ]
}
**注意:**标准分词器会把中文每个字都分词
4.3.1 IK分词器
IK Analyzer是一个开源的,基于java语言开发的轻量级的中文分词工具包。支持两种分词模式:
ik_smart:最细粒度的拆分ik_max_word:最细粒度的拆分。会尽可能多的拆出一些词
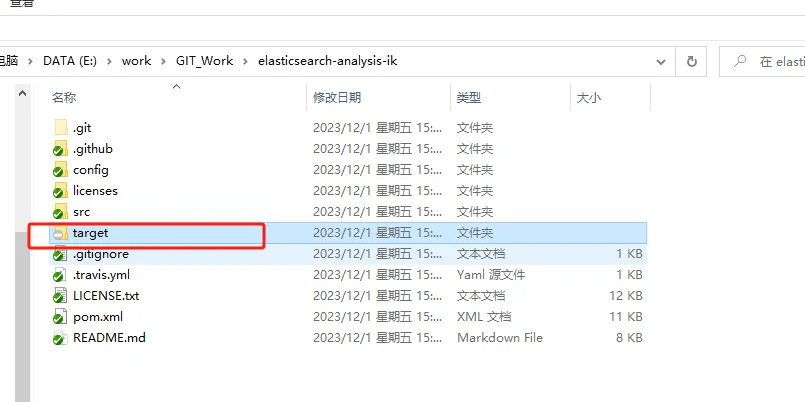
4.3.1.1 下载
-
打包
-
切换到和
elastic版本对应的分支 -
打包
-
-
找到文件并解压
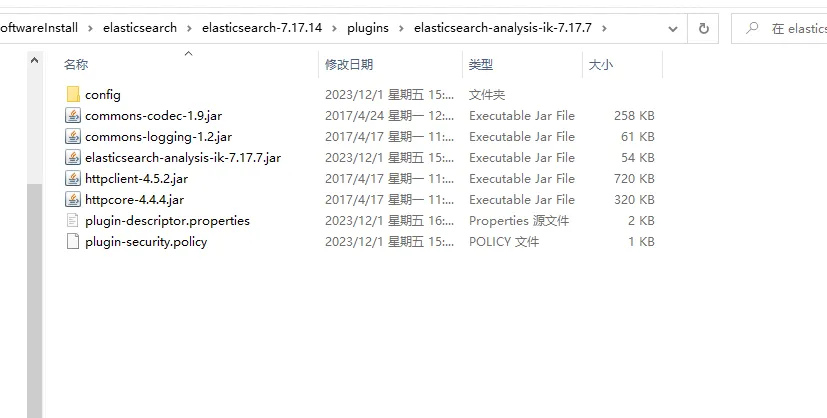
- 解压
target\releases目录下的elasticsearch-analysis-ik-7.17.7.zip到elastic安装目录下的plugins目录下
- 解压

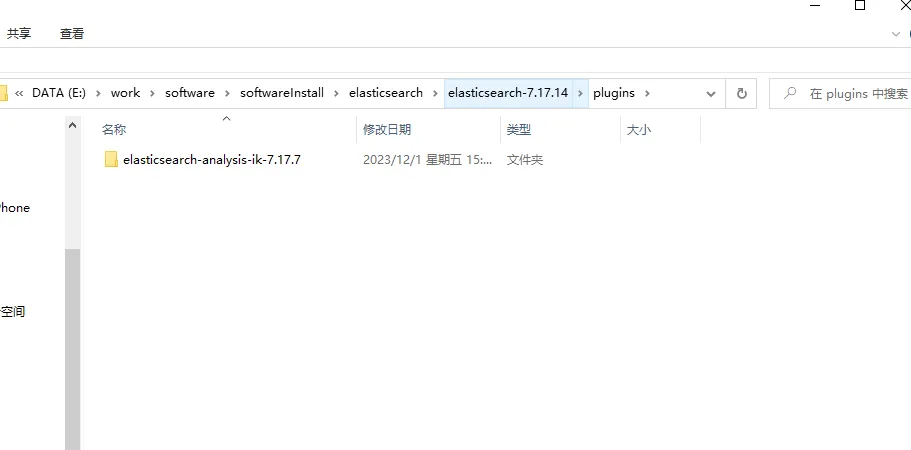
解压后目录结构如下:
4.3.1.2 启动
执行命令
/bin/elasticsearch.bat
结果
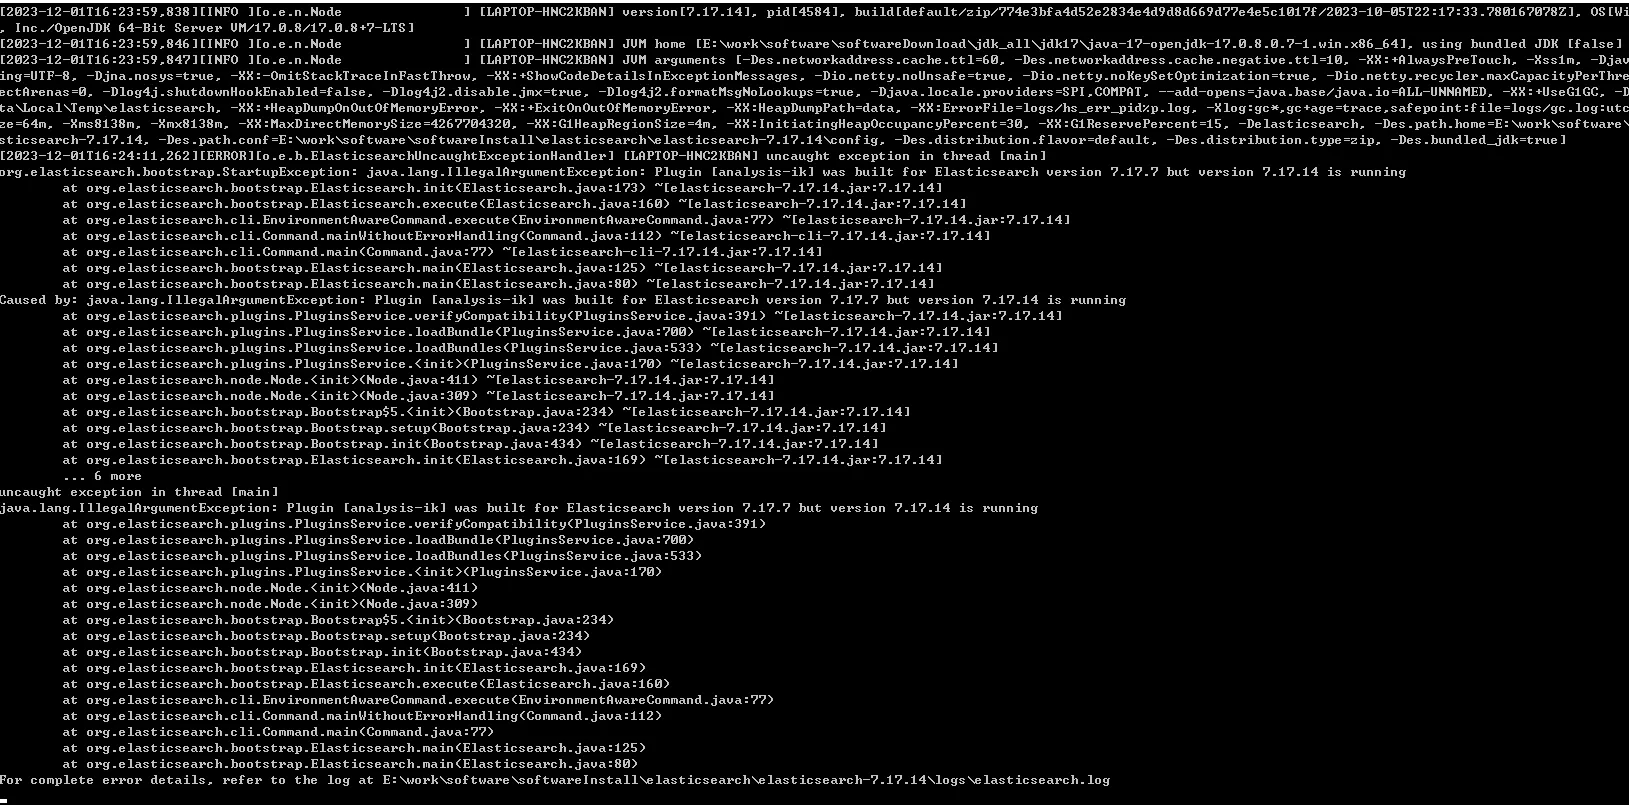
[2023-12-01T16:24:11,262][ERROR][o.e.b.ElasticsearchUncaughtExceptionHandler] [LAPTOP-HNC2KBAN] uncaught exception in thread [main]
org.elasticsearch.bootstrap.StartupException: java.lang.IllegalArgumentException: Plugin [analysis-ik] was built for Elasticsearch version 7.17.7 but version 7.17.14 is running
	at org.elasticsearch.bootstrap.Elasticsearch.init(Elasticsearch.java:173) ~[elasticsearch-7.17.14.jar:7.17.14]
	at org.elasticsearch.bootstrap.Elasticsearch.execute(Elasticsearch.java:160) ~[elasticsearch-7.17.14.jar:7.17.14]
	at org.elasticsearch.cli.EnvironmentAwareCommand.execute(EnvironmentAwareCommand.java:77) ~[elasticsearch-7.17.14.jar:7.17.14]
	at org.elasticsearch.cli.Command.mainWithoutErrorHandling(Command.java:112) ~[elasticsearch-cli-7.17.14.jar:7.17.14]
	at org.elasticsearch.cli.Command.main(Command.java:77) ~[elasticsearch-cli-7.17.14.jar:7.17.14]
	at org.elasticsearch.bootstrap.Elasticsearch.main(Elasticsearch.java:125) ~[elasticsearch-7.17.14.jar:7.17.14]
	at org.elasticsearch.bootstrap.Elasticsearch.main(Elasticsearch.java:80) ~[elasticsearch-7.17.14.jar:7.17.14]
Caused by: java.lang.IllegalArgumentException: Plugin [analysis-ik] was built for Elasticsearch version 7.17.7 but version 7.17.14 is running
	at org.elasticsearch.plugins.PluginsService.verifyCompatibility(PluginsService.java:391) ~[elasticsearch-7.17.14.jar:7.17.14]
	at org.elasticsearch.plugins.PluginsService.loadBundle(PluginsService.java:700) ~[elasticsearch-7.17.14.jar:7.17.14]
	at org.elasticsearch.plugins.PluginsService.loadBundles(PluginsService.java:533) ~[elasticsearch-7.17.14.jar:7.17.14]
	at org.elasticsearch.plugins.PluginsService.<init>(PluginsService.java:170) ~[elasticsearch-7.17.14.jar:7.17.14]
	at org.elasticsearch.node.Node.<init>(Node.java:411) ~[elasticsearch-7.17.14.jar:7.17.14]
	at org.elasticsearch.node.Node.<init>(Node.java:309) ~[elasticsearch-7.17.14.jar:7.17.14]
	at org.elasticsearch.bootstrap.Bootstrap$5.<init>(Bootstrap.java:234) ~[elasticsearch-7.17.14.jar:7.17.14]
	at org.elasticsearch.bootstrap.Bootstrap.setup(Bootstrap.java:234) ~[elasticsearch-7.17.14.jar:7.17.14]
	at org.elasticsearch.bootstrap.Bootstrap.init(Bootstrap.java:434) ~[elasticsearch-7.17.14.jar:7.17.14]
	at org.elasticsearch.bootstrap.Elasticsearch.init(Elasticsearch.java:169) ~[elasticsearch-7.17.14.jar:7.17.14]
	... 6 more
分析
IK分词器7.x的最新版是7.17.7,和elastic版本不一致
4.3.1.3 问题
IK分词器版本和elastic版本不一致
4.3.1.4 解决
修改IK分词器配置文件:plugins\elasticsearch-analysis-ik-7.17.7\plugin-descriptor.properties
原始配置
bash# Elasticsearch plugin descriptor file
# This file must exist as 'plugin-descriptor.properties' at
# the root directory of all plugins.
#
# A plugin can be 'site', 'jvm', or both.
#
### example site plugin for "foo":
#
# foo.zip <-- zip file for the plugin, with this structure:
#   _site/ <-- the contents that will be served
#   plugin-descriptor.properties <-- example contents below:
#
# site=true
# description=My cool plugin
# version=1.0
#
### example jvm plugin for "foo"
#
# foo.zip <-- zip file for the plugin, with this structure:
#   <arbitrary name1>.jar <-- classes, resources, dependencies
#   <arbitrary nameN>.jar <-- any number of jars
#   plugin-descriptor.properties <-- example contents below:
#
# jvm=true
# classname=foo.bar.BazPlugin
# description=My cool plugin
# version=2.0.0-rc1
# elasticsearch.version=2.0
# java.version=1.7
#
### mandatory elements for all plugins:
#
# 'description': simple summary of the plugin
description=IK Analyzer for Elasticsearch
#
# 'version': plugin's version
version=7.17.7
#
# 'name': the plugin name
name=analysis-ik
#
# 'classname': the name of the class to load, fully-qualified.
classname=org.elasticsearch.plugin.analysis.ik.AnalysisIkPlugin
#
# 'java.version' version of java the code is built against
# use the system property java.specification.version
# version string must be a sequence of nonnegative decimal integers
# separated by "."'s and may have leading zeros
java.version=1.8
#
# 'elasticsearch.version' version of elasticsearch compiled against
# You will have to release a new version of the plugin for each new
# elasticsearch release. This version is checked when the plugin
# is loaded so Elasticsearch will refuse to start in the presence of
# plugins with the incorrect elasticsearch.version.
elasticsearch.version=7.17.7
修改 elasticsearch.version的版本号,改为和elastic版本号一致。这里改为 7.17.14。然后重启elastic
elasticsearch.version=7.17.14
4.3.1.5 验证
IK分词器支持两种分词模式:
ik_smartik_max_word
请求
http://127.0.0.1:9200/_analyze
参数
json{
    "text":"我是中国人",
    "analyzer":"ik_smart"
}
结果
json{
    "tokens": [
        {
            "token": "我",
            "start_offset": 0,
            "end_offset": 1,
            "type": "CN_CHAR",
            "position": 0
        },
        {
            "token": "是",
            "start_offset": 1,
            "end_offset": 2,
            "type": "CN_CHAR",
            "position": 1
        },
        {
            "token": "中国人",
            "start_offset": 2,
            "end_offset": 5,
            "type": "CN_WORD",
            "position": 2
        }
    ]
}
修改分词方式
参数
json{
    "text":"我是中国人",
    "analyzer":"ik_max_word"
}
结果
json{
    "tokens": [
        {
            "token": "我",
            "start_offset": 0,
            "end_offset": 1,
            "type": "CN_CHAR",
            "position": 0
        },
        {
            "token": "是",
            "start_offset": 1,
            "end_offset": 2,
            "type": "CN_CHAR",
            "position": 1
        },
        {
            "token": "中国人",
            "start_offset": 2,
            "end_offset": 5,
            "type": "CN_WORD",
            "position": 2
        },
        {
            "token": "中国",
            "start_offset": 2,
            "end_offset": 4,
            "type": "CN_WORD",
            "position": 3
        },
        {
            "token": "国人",
            "start_offset": 3,
            "end_offset": 5,
            "type": "CN_WORD",
            "position": 4
        }
    ]
}
4.3.2 扩展词典
针对一些专有名词,需要配置扩展词典。如下:“弗雷尔卓德”是一个词,不应该再进行拆分
请求
http://127.0.0.1:9200/_analyze
参数
json{
    "text":"弗雷尔卓德",
    "analyzer":"ik_smart"
}
结果
json{
    "tokens": [
        {
            "token": "弗",
            "start_offset": 0,
            "end_offset": 1,
            "type": "CN_CHAR",
            "position": 0
        },
        {
            "token": "雷",
            "start_offset": 1,
            "end_offset": 2,
            "type": "CN_CHAR",
            "position": 1
        },
        {
            "token": "尔",
            "start_offset": 2,
            "end_offset": 3,
            "type": "CN_CHAR",
            "position": 2
        },
        {
            "token": "卓",
            "start_offset": 3,
            "end_offset": 4,
            "type": "CN_CHAR",
            "position": 3
        },
        {
            "token": "德",
            "start_offset": 4,
            "end_offset": 5,
            "type": "CN_CHAR",
            "position": 4
        }
    ]
}
对于这种问题,我们需要配置扩展字典,声明一些特殊需求的词。
4.3.2.1 配置
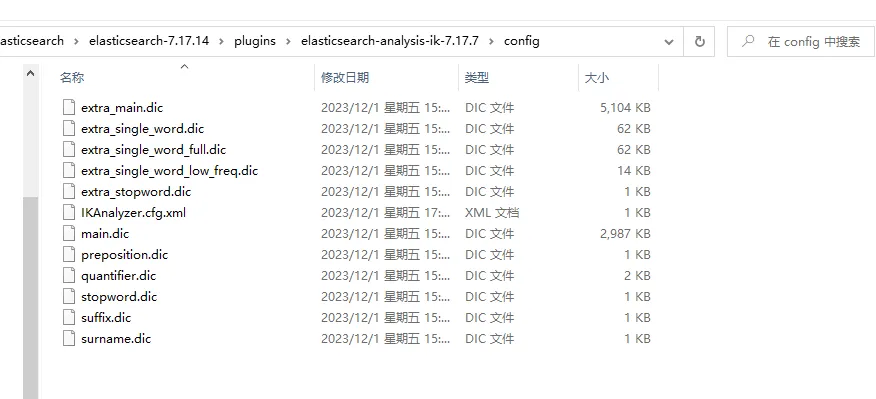
进入IK分词器的config目录 ,plugins\elasticsearch-analysis-ik-7.17.7\config。在该目录中创建字典,并在IKAnalyzer.cfg.xml中进行配置。
-
创建字典
custom.dic,添加以下内容弗雷尔卓德 -
配置字典
修改
IKAnalyzer.cfg.xml,在扩展字典中指定自定义字典custom.dic
xml<?xml version="1.0" encoding="UTF-8"?>
<!DOCTYPE properties SYSTEM "http://java.sun.com/dtd/properties.dtd">
<properties>
	<comment>IK Analyzer 扩展配置</comment>
	<!--用户可以在这里配置自己的扩展字典 -->
	<entry key="ext_dict">custom.dic</entry>
	 <!--用户可以在这里配置自己的扩展停止词字典-->
	<entry key="ext_stopwords"></entry>
	<!--用户可以在这里配置远程扩展字典 -->
	<!-- <entry key="remote_ext_dict">words_location</entry> -->
	<!--用户可以在这里配置远程扩展停止词字典-->
	<!-- <entry key="remote_ext_stopwords">words_location</entry> -->
</properties>
- 重启
4.3.2.2 验证
请求
http://127.0.0.1/9200/_analyze
参数
json{
    "text":"弗雷尔卓德",
    "analyzer":"ik_smart"
}
结果
json{
    "tokens": [
        {
            "token": "弗雷尔卓德",
            "start_offset": 0,
            "end_offset": 5,
            "type": "CN_WORD",
            "position": 0
        }
    ]
}
可以看到,“弗雷尔卓德”已经作为一个词,没有继续被拆分。
4.3.3 自定义分词器
5. Kibana
kiban是一个免费开放的用户界面,提供了很多针对elasticsearch中数据的功能操作。
- 搜索、观察和保护
能够搜索、观察和保护数据是任何分析师的要求。 Kibana 为每个用例提供了解决方案。

企业级搜索使你能够为应用、工作区和网站创建搜索体验。

借助 Elastic 可观测性,您可以实时监控和应用分析 到所有环境中发生的事件。您可以分析日志事件,监控主机或容器的性能指标 它运行,跟踪事务,并检查整体服务可用性。

Elastic 安全专为安全分析师设计,概述了 来自环境的事件和警报。Elastic 安全帮助您防御 您的组织在损害和损失发生之前免受威胁。
- 分析
借助 Kibana Analytics,您可以快速搜索大量数据 的数据,探索字段和值, 然后使用拖放界面快速构建图表、表格、指标等。
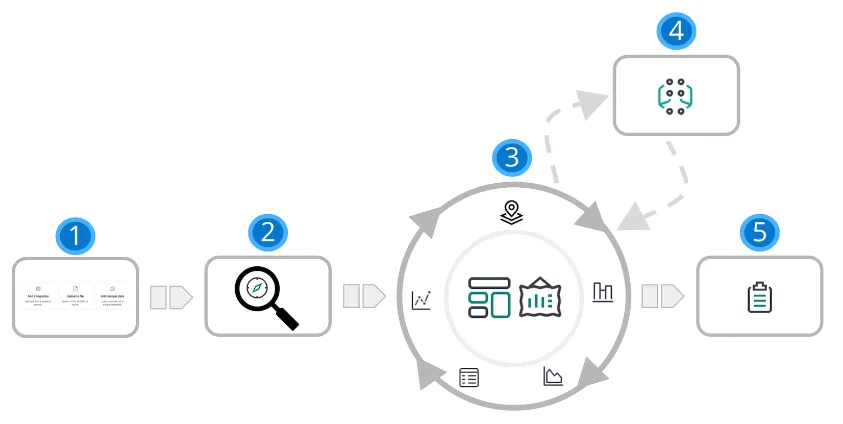
| 1 | **添加数据。**向 Elastic Stack 添加数据的最佳方式是使用我们的众多集成之一。 或者,您可以添加示例数据集或上传文件。所有三个选项都可用 在主页上。 |
|---|---|
| 2 | **探讨。**借助 Google 探索,您可以在数据中搜索隐藏的数据 见解和关系。提出问题,然后将结果筛选为仅所需的数据。 您可以将结果限制为添加到 Elasticsearch 的最新文档。 |
| 3 | **可视 化。**Kibana 提供了许多选项来创建数据可视化,从 从基于聚合的数据到时间序列数据再到地理数据。仪表板是创建可视化的起点, 然后将它们组合在一起,从多个角度显示您的数据。 使用 Canvas, 提供您的数据 在大屏幕上显示的“哇”因素。使用 Graph 探索模式和关系。 |
| 4 | **对数据行为进行建模。**使用机器学习对数据行为进行建模 - 预测异常行为和 执行异常值检测、回归和分类分析。 |
| 5 | **共享。**准备好与更多观众分享您的发现了吗?Kibana 提供了许多选项 - 嵌入 仪表板、共享链接、导出为 PDF 等。 |
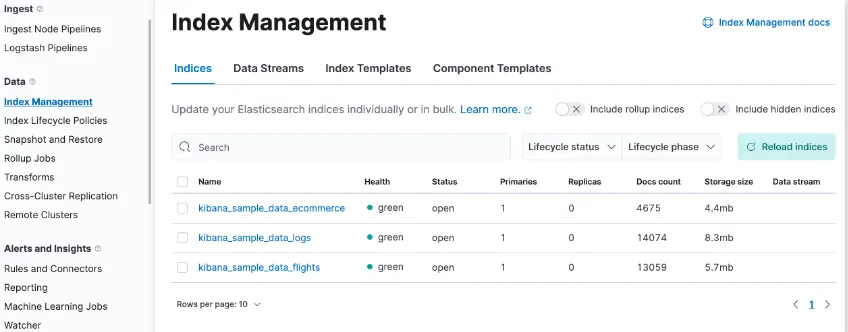
- 管理数据
Kibana 可帮助您通过 UI 轻松执行数据管理任务。您可以:
- 刷新、刷新和清除索引的缓存。
- 定义索引老化时的生命周期。
- 定义用于拍摄集群快照的策略。
- 将一个或多个索引中的数据汇总到一个新的紧凑索引中。
- 在远程集群上复制索引,并将其复制到本地集群。
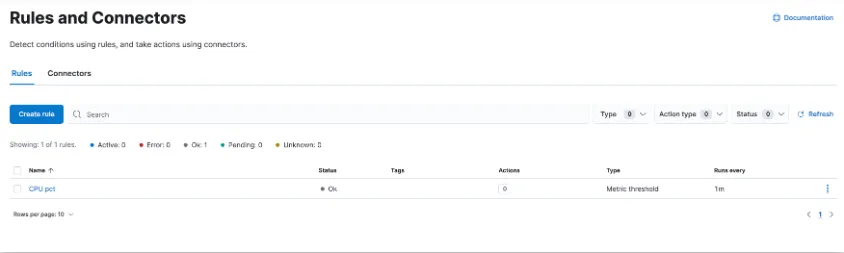
- 警报并采取措施
需要检测数据中的重大变化和信号并采取行动 这几乎存在于每个用例中。通过警报,您可以 检测不同 Kibana 应用中的条件,并在满足这些条件时触发操作。 例如,当业务关键型 KPI 发生转变或 内存、CPU 或磁盘空间下降。 当警报触发时,您可以向作为日常工作流一部分的系统发送通知: 电子邮件、Slack、PagerDuty、ServiceNow 和其他第三方集成。
用于创建、搜索、 编辑规则位于“规则和连接器”中。
- 组织内容
您可能正在管理数十个、数百个甚至数千个仪表板、可视化和其他 Kibana 资产。 Kibana 具有多种功能,可让您的内容井井有条。
- 收集空间中的相关项目
Kibana 提供了用于组织可视化、仪表板、数据视图等的空间。 将空间视为它自己的迷你 Kibana 装置,它与所有其他空间隔离开来, 因此,您可以根据自己的特定需求进行定制,而不会影响他人。

- 使用标签组织内容
标签是分配给已保存对象的关键字或标签, 例如仪表板和可视化效果,以便您可以以对您有意义的方式对它们进行分类。 例如,如果使用“design”标记对象,则可以搜索和 对标签进行筛选以查看所有相关对象。 标签也适用于将内容分组到空间内的类别中。
如果您有数百个需要标记的仪表板,请不要担心。使用堆栈管理中的标签创建标签,然后分配和删除 它们在批量操作中。
5.1 下载
kibana下载地址
https://artifacts.elastic.co/downloads/kibana/kibana-7.17.164-windows-x86_64.zip
5.2 配置
xml# Kibana is served by a back end server. This setting specifies the port to use.
server.port: 5601

# The URLs of the Elasticsearch instances to use for all your queries.
elasticsearch.hosts: ["http://localhost:9200","http://localhost:9201","http://localhost:9202"]

#支持中文
i18n.locale: "zh-CN"
5.3 启动
执行以下命令进行启动
./bin/kibana.bat
5.4 问题
问题一
Kibana is currently running with legacy OpenSSL providers enabled
问题描述
解决方案
官方解决方法:
https://www.elastic.co/guide/en/kibana/7.17/production.html#openssl-legacy-provider
Starting in 7.17.13, Kibana has upgraded its runtime environment, Node.js, from version 16 to version 18 and with it the underlying version of OpenSSL to version 3. Algorithms deemed legacy by OpenSSL 3 have been re-enabled to avoid potential breaking changes in a minor version release of Kibana. If SSL certificates configured for Kibana are not using any of the legacy algorithms mentioned in the OpenSSL legacy provider documentation, we recommend disabling this setting by removing in the config file.--openssl-legacy-providernode.options
即,编辑配置文件node.options。注释掉:--openssl-legacy-provider
## Node command line options
## See `node --help` and `node --v8-options` for available options
## Please note you should specify one option per line

## max size of old space in megabytes
#--max-old-space-size=4096

## do not terminate process on unhandled promise rejection
 --unhandled-rejections=warn

## restore < Node 16 default DNS lookup behavior
--dns-result-order=ipv4first

## enable OpenSSL 3 legacy provider
##--openssl-legacy-provider
然后重启服务
问题二
Elasticsearch built-in security features are not enabled. Without authentication, your cluster could be accessible to anyone. See https://www.elastic.co/guide/en/elasticsearch/reference/7.17/security-minimal-setup.html to enable security
问题描述
elastic stack 7.13以上版本,在默认不开启elastic安全功能时,kibana的搜索结果页面会多出一行提示,建议我们开启elasticsearch安全功能。
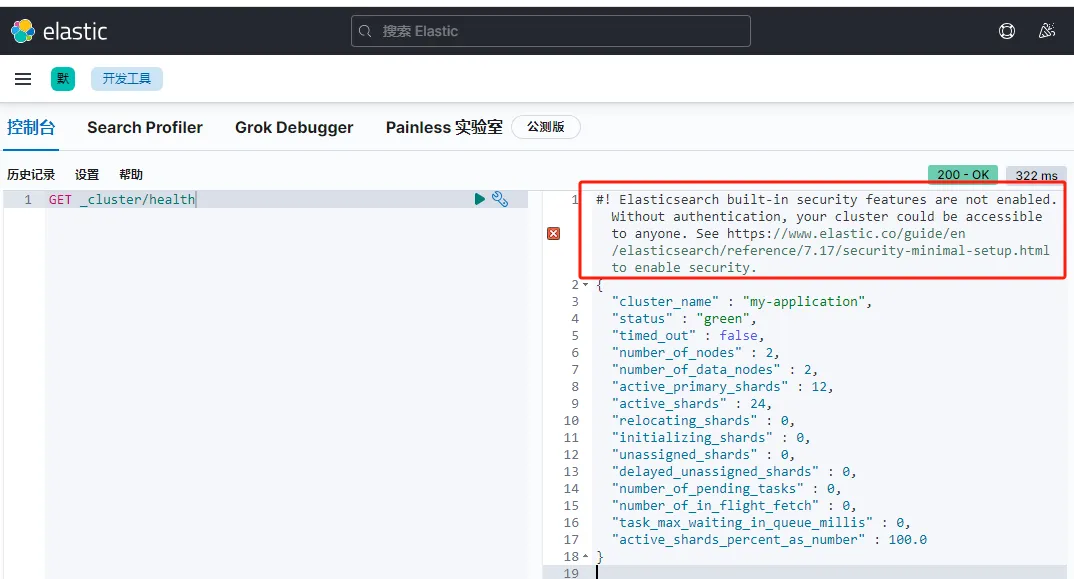
解决方案
两个解决方案。一个是禁用安全选项,一个是配置认证
-
禁用安全选项 在
elasticsearch.yml中配置禁用安全选项xpack.security.enabled: false -
启用安全选项
-
启用。在
elasticsearch.yml中配置禁用安全选项xpack.security.enabled: true -
配置
查看:安装 -> 配置 -> 安全选项 -> 配置密码
-
本文作者:widdo
本文链接:
版权声明:本博客所有文章除特别声明外,均采用 BY-NC-SA 许可协议。转载请注明出处!